![]() This guide will walk you through the installation process of the Care Control system using the Launcher released at the start of 2020.
This guide will walk you through the installation process of the Care Control system using the Launcher released at the start of 2020.
The process will install several components. The main three that you’ll see are:
- CCLauncher – this checks that all necessary components are installed. If they are, it will start Care Control. If something is missing, the Launcher will start CCInstaller.
- CCInstaller– this installs any programs or components required (SQL, LocalDB and Access Runtime among others) that will require Administrator Permission on the computer.
- Care Control
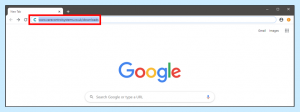
Open a browser and enter www.carecontrolsystems.co.uk/downloads into the address bar.
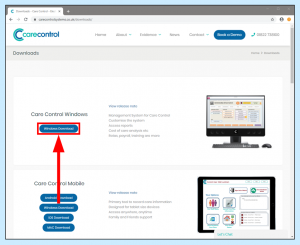
When the Downloads page has loaded, click Windows Download for Care Control Windows.
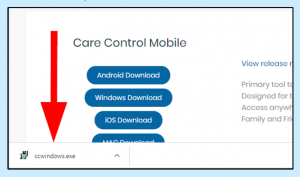
After clicking Windows Download you will get a notification to say the file is ready for opening – click it to start the installation process. The position of this will vary from one browser to another.
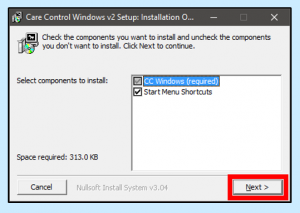
A window will appear showing the components that will be installed. CC Windows is mandatory, but you can select not to have a Start Menu Shortcut. Click Next when you’re ready to proceed.
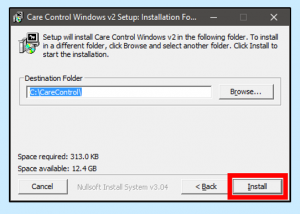
The next window will determine where the Care Control Folders will be stored on the computer. This is defaulted to C:\CareControl\ and we highly recommend leaving this. Click Install to proceed.
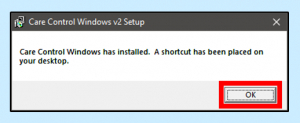
The system will install the initial components onto your machine. When this is complete you will get a message telling you that CC Windows has been installed. Click OK. If you don’t have Administrator permissions, you will be required to enter a password.
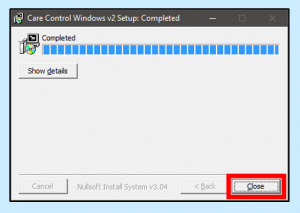
Another window will be behind showing that the setup has been completed. Click Close.
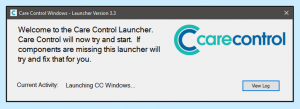
The installation process will have created a shortcut on your desktop. Double-click this to open the Launcher.
The Launcher will start to check which components are required, checking your system settings, installed versions of Office and more.
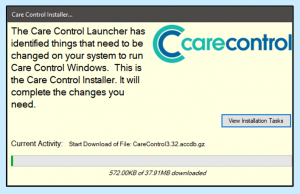
The system will then need to open CCInstaller. This will begin to install all necessary components. If you don’t have Administrator rights you’ll be required to enter a password here.
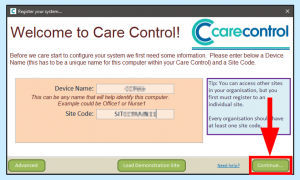
Once this is completed the Installer will close and Launcher will start the main Care Control application. For first time use you will be required to enter a Device Name (this can be anything i.e. Nurse Station) and your Site Code (this will have been provided previously and starts with SIT).
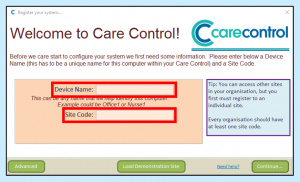
When these are entered, click Continue.
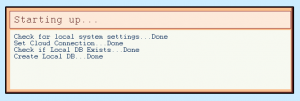
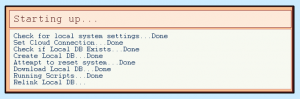
The system will go through a start-up sequence, checking that there is an internet connection, that components are set up correctly etc.
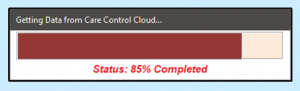
Once these checks are complete, the system will begin to load.
A box will appear, showing you the site/home/service that you are loading, the current version of Care Control and how many service users/clients you licence is set to.

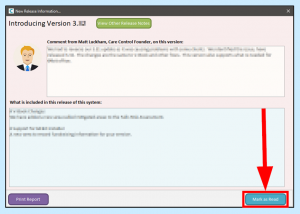
All new instalments and updates also load a window that displays the most recent Release Notes. These outline any changes that have been made, features that have been added etc. Click Mark as Read to proceed. All release notes can be read from within the system at a later date.
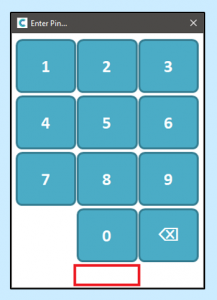
After this you will be presented with a PIN screen. Press the numbered keys on the screen to enter your PIN. Please note that you cannot type your PIN on this screen.
When your PIN is accepted the system will load. As a default, the system is set to open into the Administration side of the system – to set the system to load for non-administrative staff please check out our guide on switching the computer to staff access.