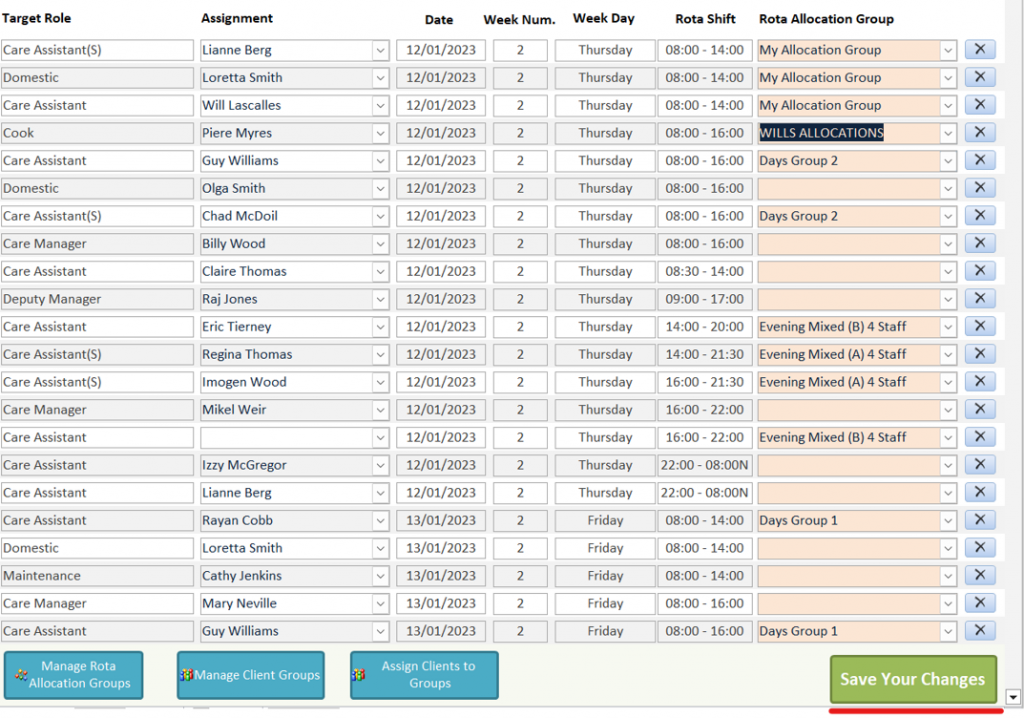
For assigning your allocation groups to the rota, you have two options. You can assign in bulk, or individually.
For Bulk Allocations
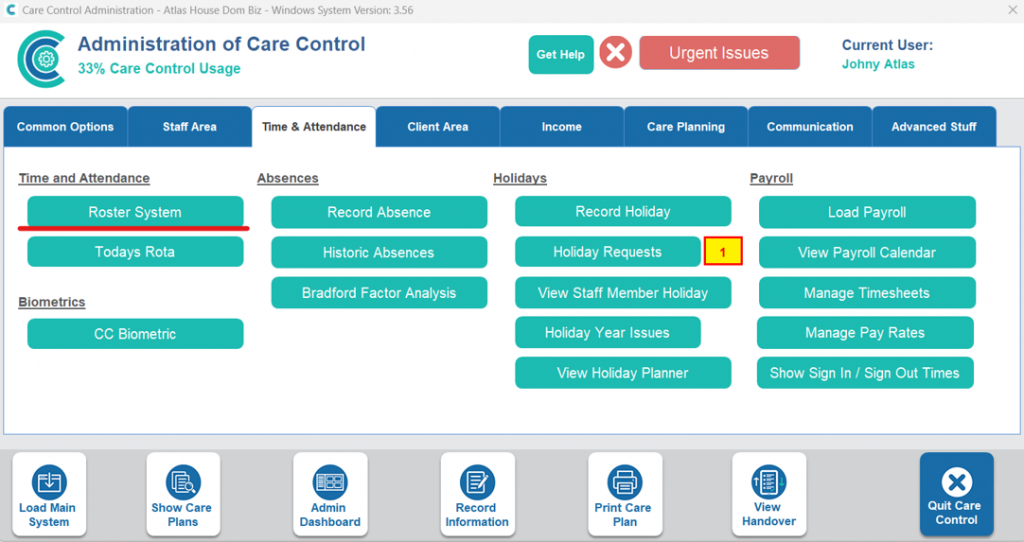
First, we need to go to the Roster System under the Time & Attendance Tab
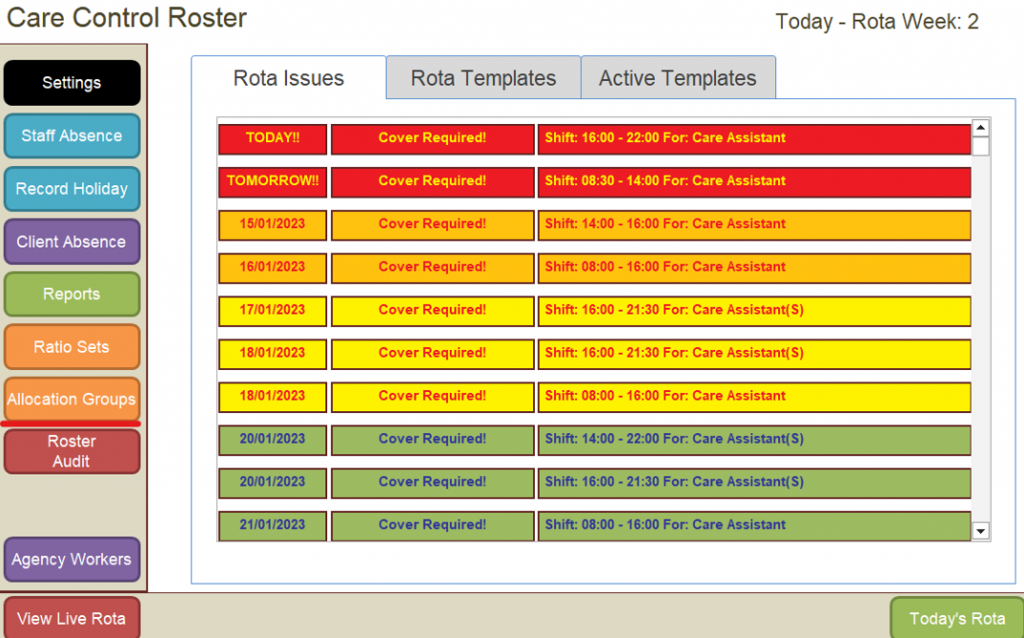
In the Roster System- select “Allocation Groups”
Here, you can either bulk assign to a template or to the live rota.
Both live rota and Template work in the same way. You select the option from “Load Rota” or “Template Set” and then for templates select the name of the template from the dropdown. You do not need to do this for Live Rota- you just need to enter the date range. Select “Load Data”
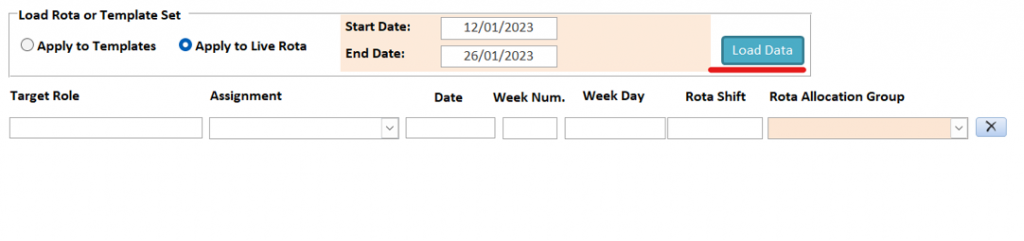
Now, you just need to select the Rota Allocation Group from the dropdown to the right of any of the shifts you would like to assign. Once you are finished, select “Save Changes”. The shifts will now be allocated to your group and you will receive confirmation that the bulk allocation has been saved.
For Individual Allocations
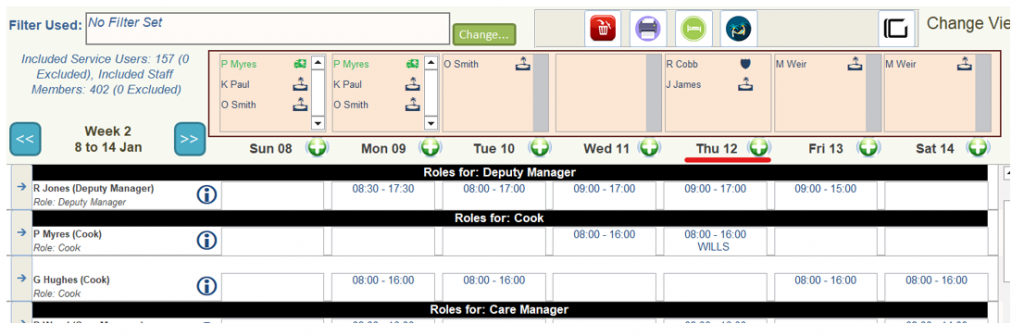
To assign through the live rota- go back to the “Roster System” screen. Select “View Live Rota”

You can now add the allocation to an existing rota entry or a new one. For this example, we will create a new rota entry. Select the green plus next to the date you would like to add the rota entry on.
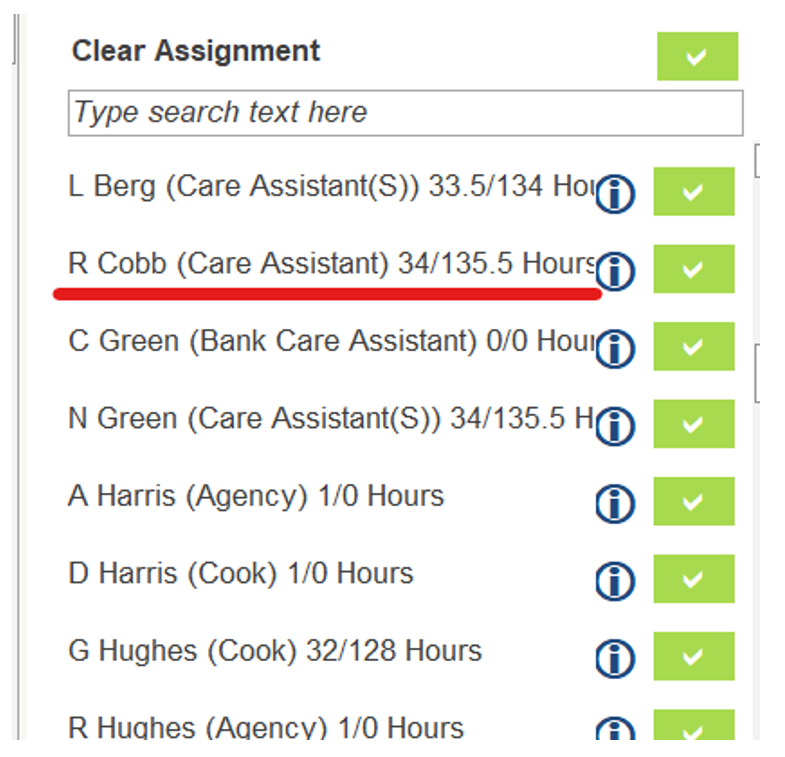
This will load the smart board. Select the name of the staff member you require for the rota entry.
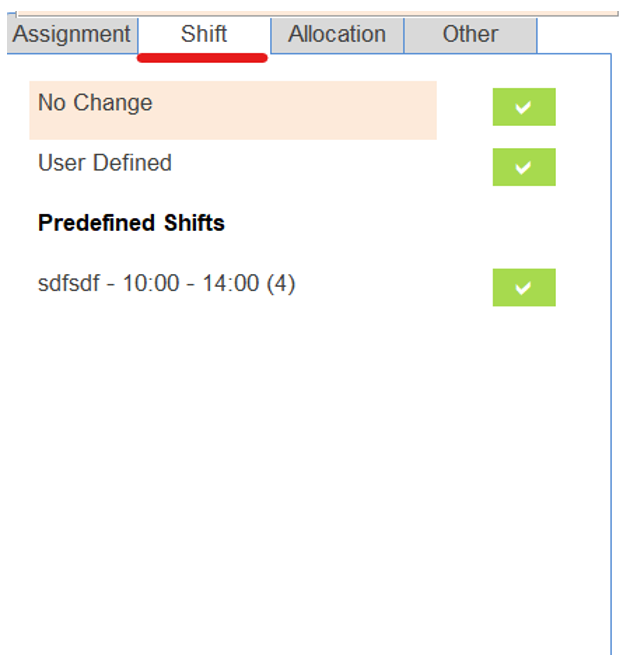
Switch to the “Shift” tab to assign the rota hours.
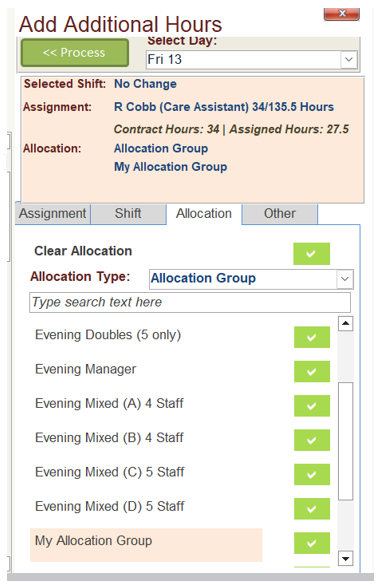
Select the “Allocation” tab.
For “Allocation Type” select “Allocation Group”. Select your rota group from the list. Once selected, confirm your details are correct in the orange area and select “Process”.