Sometimes a rota template becomes outdated, and needs deactivating to make way for an updated one. The first part of this guide will cover how this can be done.
It can also be useful to clear the live rota so that a new template can be processed onto it. This can help avoid issues where information from an existing template remains after deactivating it. The second part of this guide will cover how this can be done.
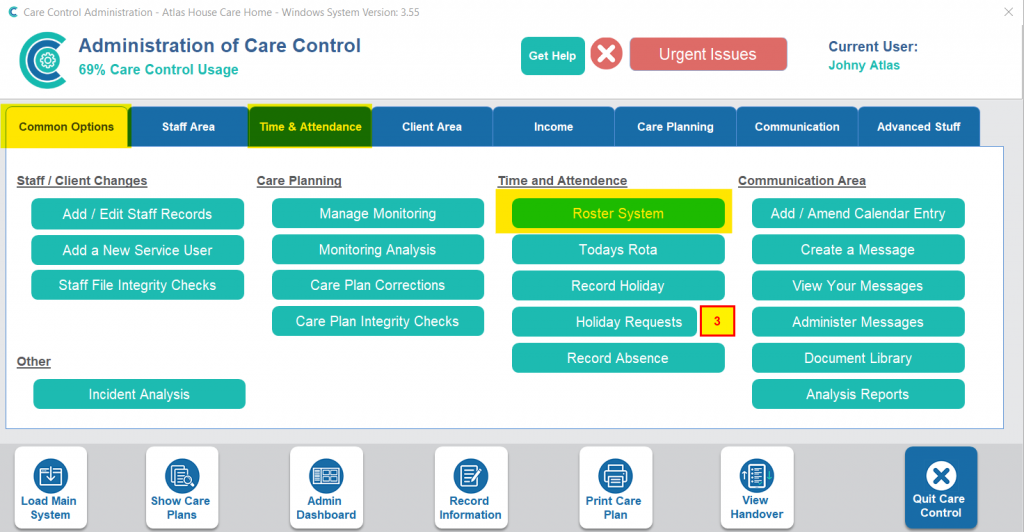
In the Administration of Care Control Windows, navigate to the Roster System, which can be found under the Common Options and Time & Attendance tabs.
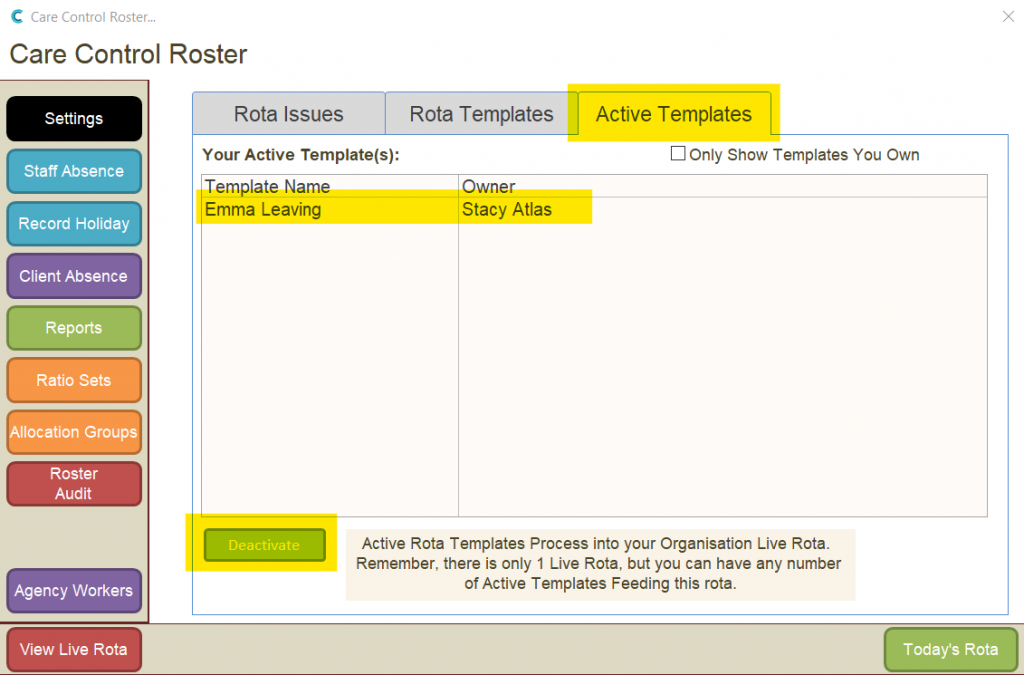
Find the active template you wish to deactivate by selecting Active Templates, and then the template in question. Finally, press Deactivate.
This will open a new window. Here, enter the date that this rota template is due to end (can be in the past or future). Also enter a reason for this template ending. Finally, select Continue.
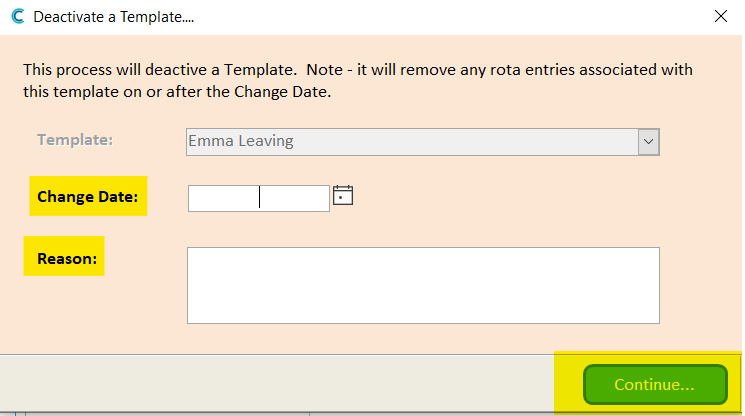
Your template will now be deactivated.
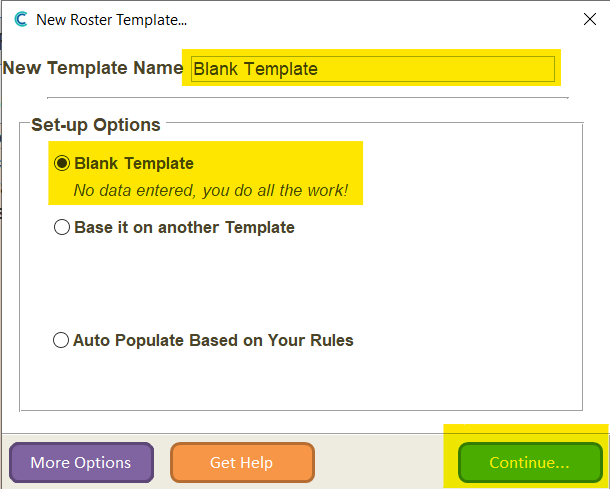
To blank the rota so that any existing live rota is removed, simply create a new template from the Roster System template screen (press Add New).
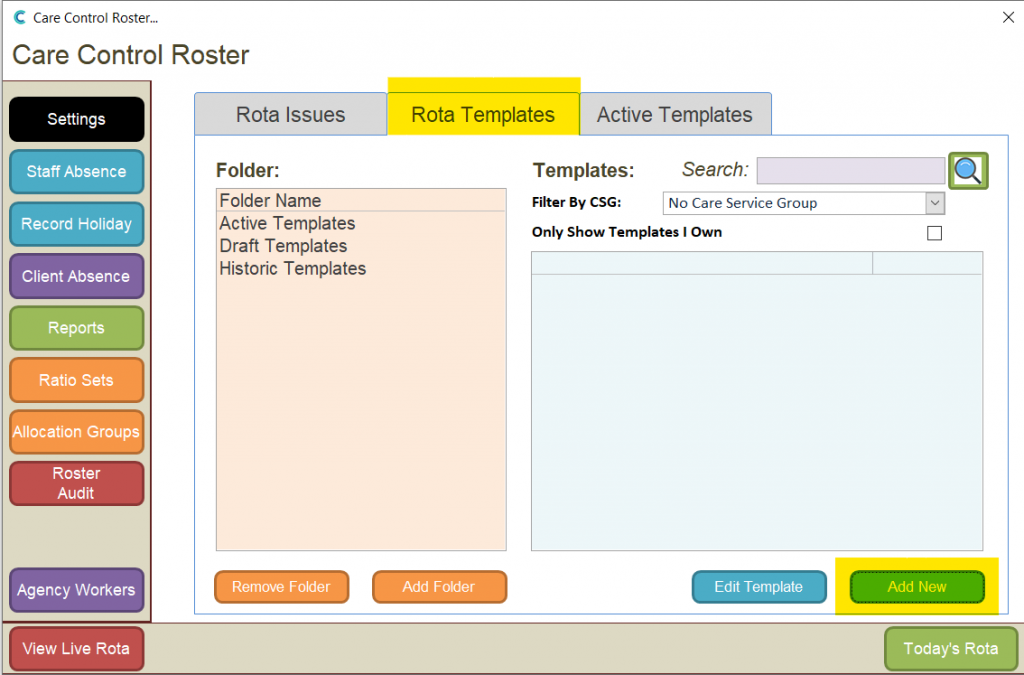
Choose the Blank Template option, give it a name, and select Continue.
The blank template will open. Select the red & blue arrows from the tool bar at the top. This will open the processing window.
- Set Switch to Active Template to Yes
- Set the process option as Replace ALL Data
- Set the start date from which you want to clear the rota
- Set the number of weeks to process
- Select Mark Here to Force Process Now
- Press Save Changes
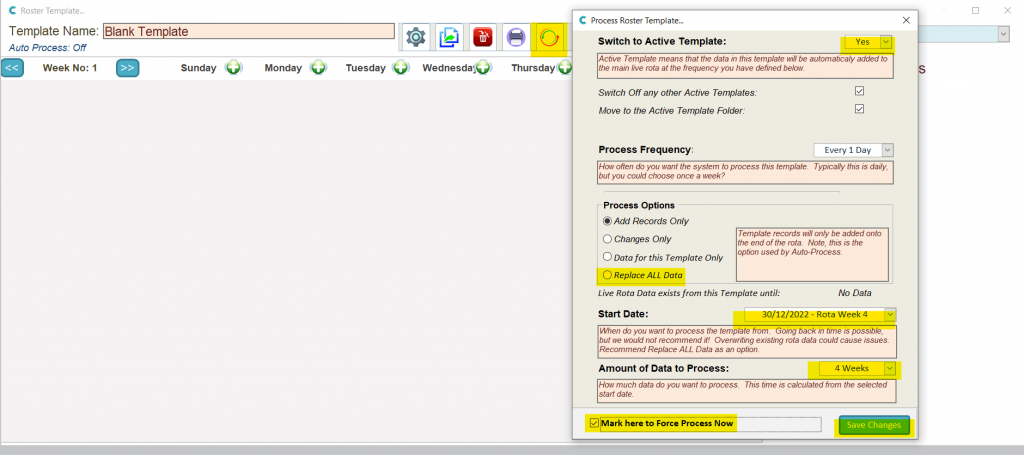
Your rota will no be blank from the start date set.