Each rota template has a set amount of weeks which it shows before repeating. This can vary between templates and can be changed according to how you wish to set up your rota.
If the incorrect number of weeks is displaying, or you wish to amend the number of weeks then:
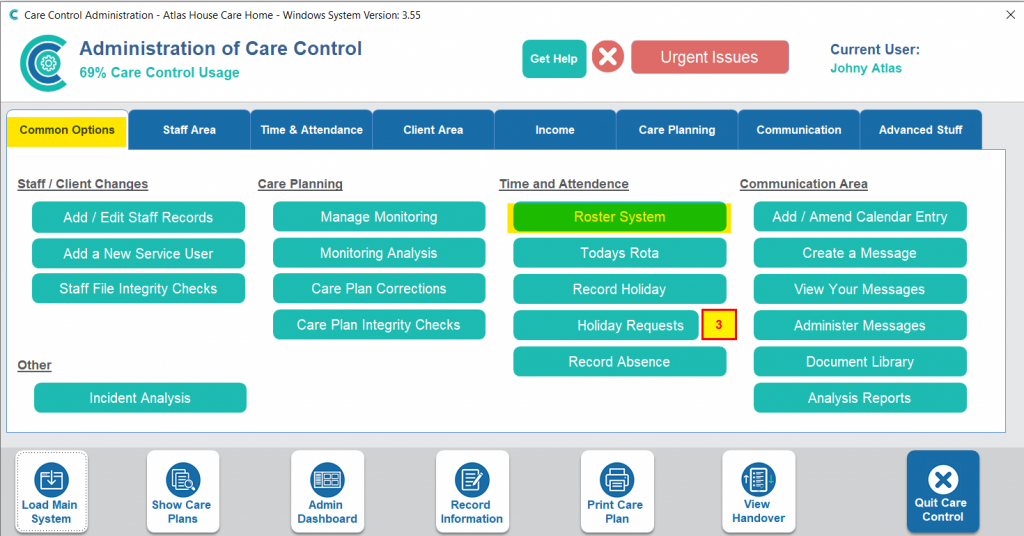
First, in the Administration of Care Control Windows, navigate to the Roster System which can be found under the Common Options and Time and Attendance tabs.
This will open the roster system window. Here, select Settings from the left hand options.

Within the settings, choose Core Settings from the left hand options. Scroll down into the Templates – Auto Processing etc. section and find the setting labelled Variable Weeks for Templates.
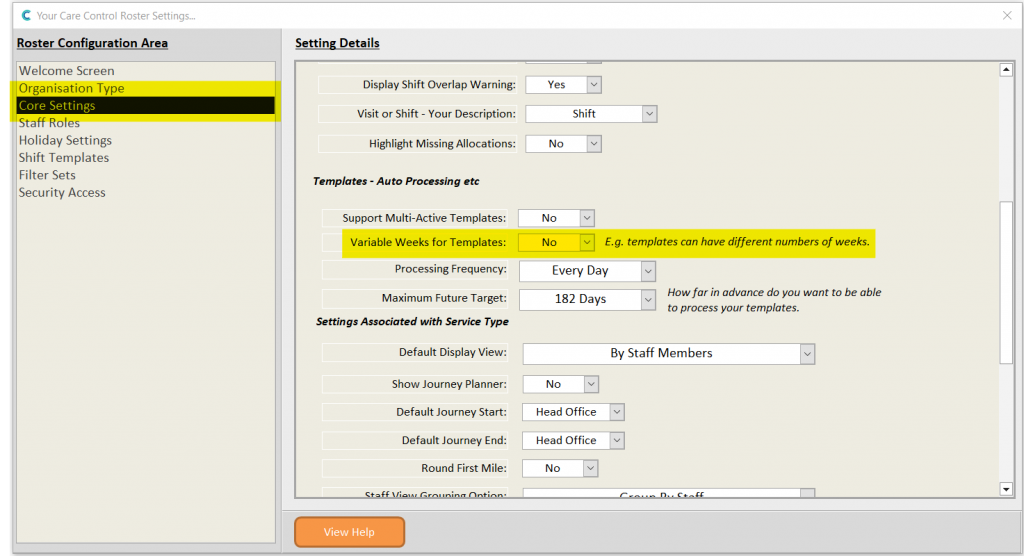
In order to set up different templates, with different weeks, turn this setting to Yes. Also change this to Yes if your template is showing the incorrect number of weeks.
Make sure to Save Changes.
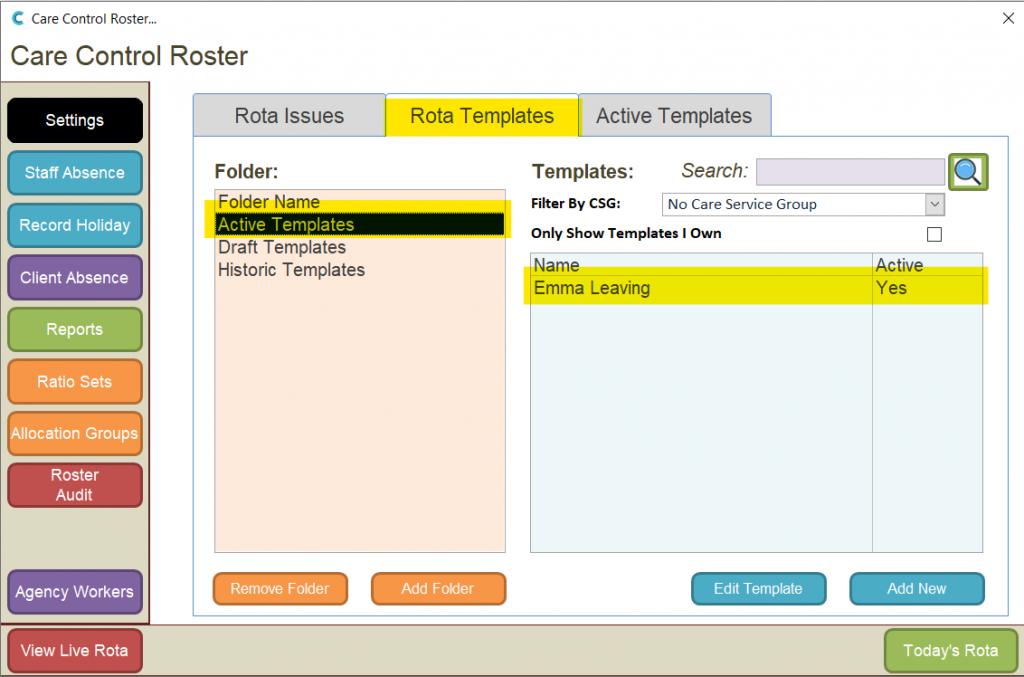
Close the settings page to take you back to the Roster System. Here, select Rota Templates, and find your Active Template. Double click on the name to open it.
After the template has opened, press the Settings Cog from the toolbar at the top of the window.
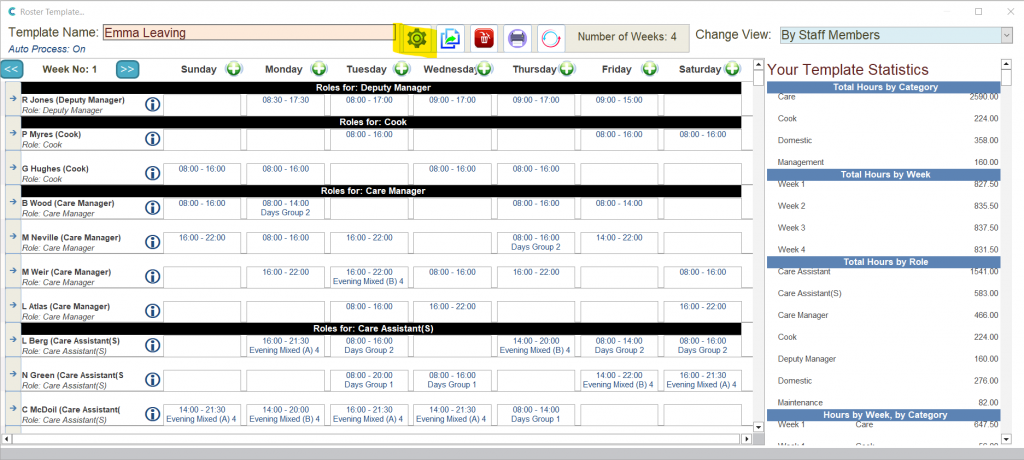
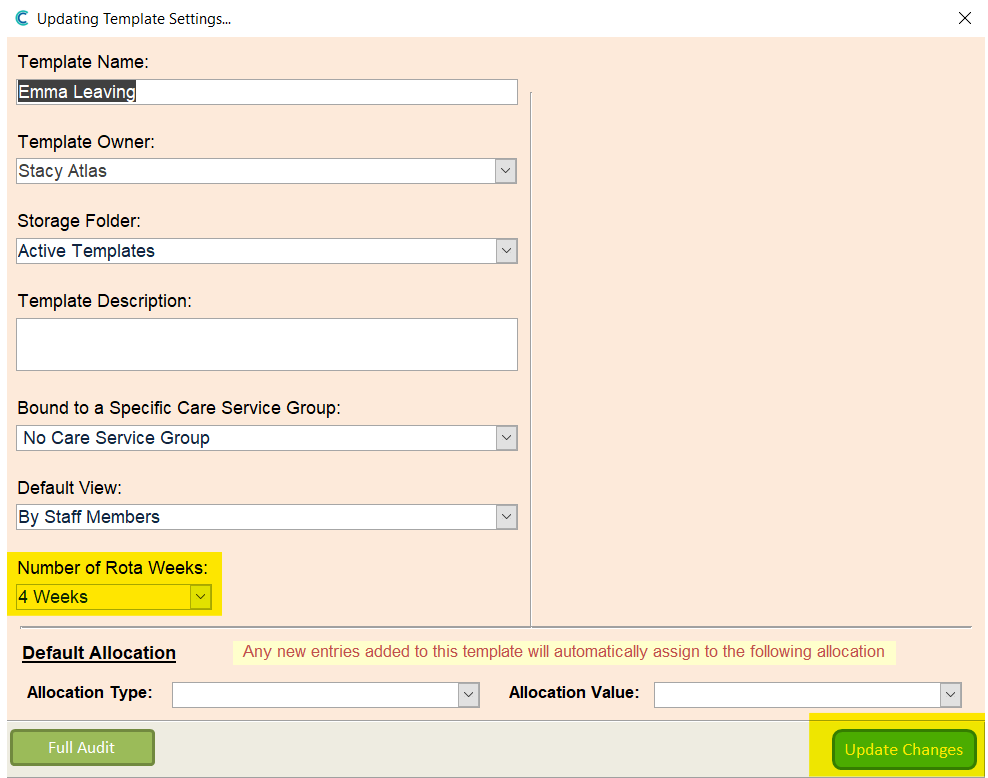
This will open the settings related to this template. You will see an option labelled Number of Rota Weeks. You can now change this to the number you wish. Make sure to Update Changes afterwards.
Your rota template will now be set for that number of weeks. If you have multiple templates which require different weeks, you can continue to edit the other templates in the same way.
However, if you were simply fixing incorrect template weeks, follow the first steps in this guide (screenshots 1-3) and change the Variable Weeks for Templates setting back to No.