CSG Geocoding – Manual Latitude and Longitude Entry
Guide Introduction
This guide will cover how to manually enter latitude and longitude measurements for a CSG location.
This can be useful when a postcode alone is not accurate enough for mileage reports. The Care Control mileage calculator uses Google Maps to calculate distances. Sometimes, when postcodes are entered into Google Maps, the location marked may not be the exact location of the site and therefore give inaccurate mileage readings.
This can be resolved by manually entering the location of the site, instead of using the postcode.
1)

First, open Google Maps in your internet browser. Then, enter the currently used postcode for the location. In this example, we use the Care Control office postcode.
As you can see, the postcode marks the area outlined in red dots, and not our office specifically.
2)
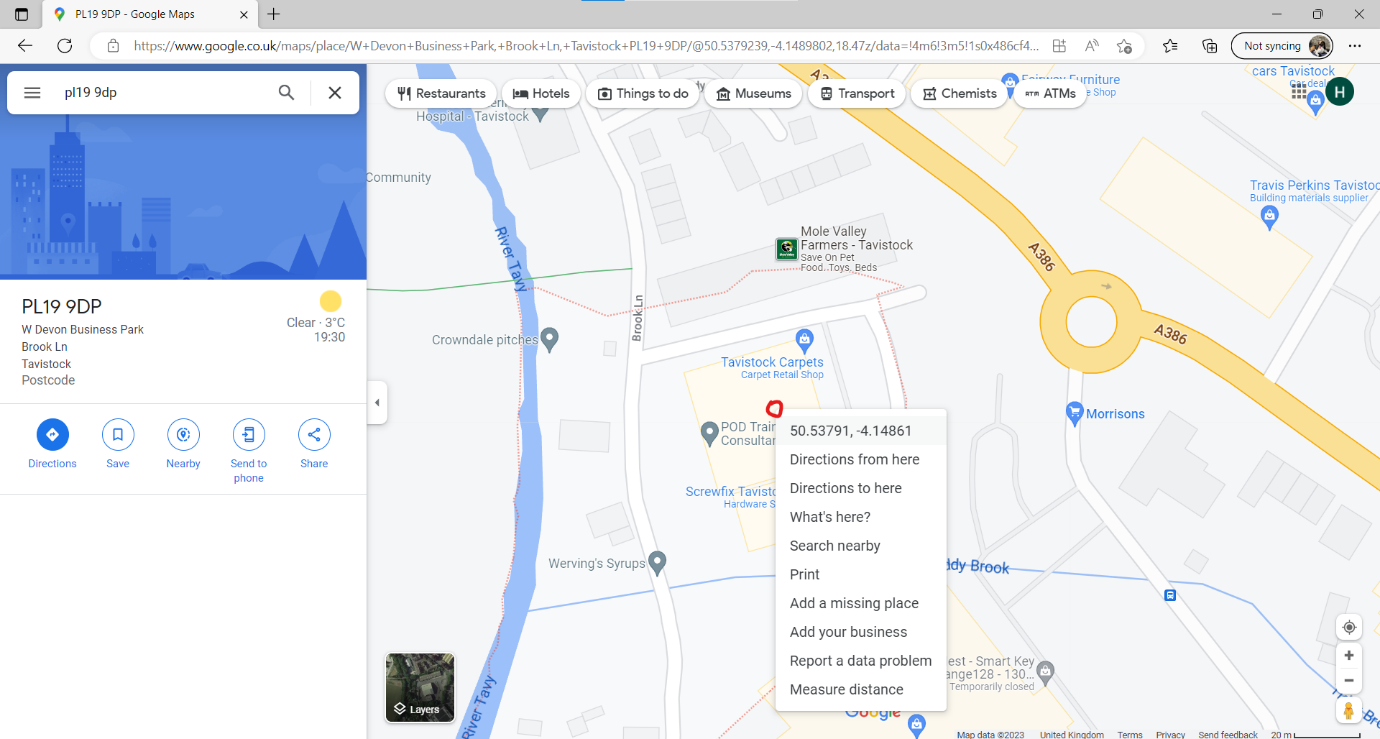
Find the actual location of the site and right click. The longitude and latitude values can be seen.
In this example, our office is located within the yellow building. After right clicking here, the exact location is given.
3)
After right clicking the exact location, press the longitude / latitude values to copy them.
4)
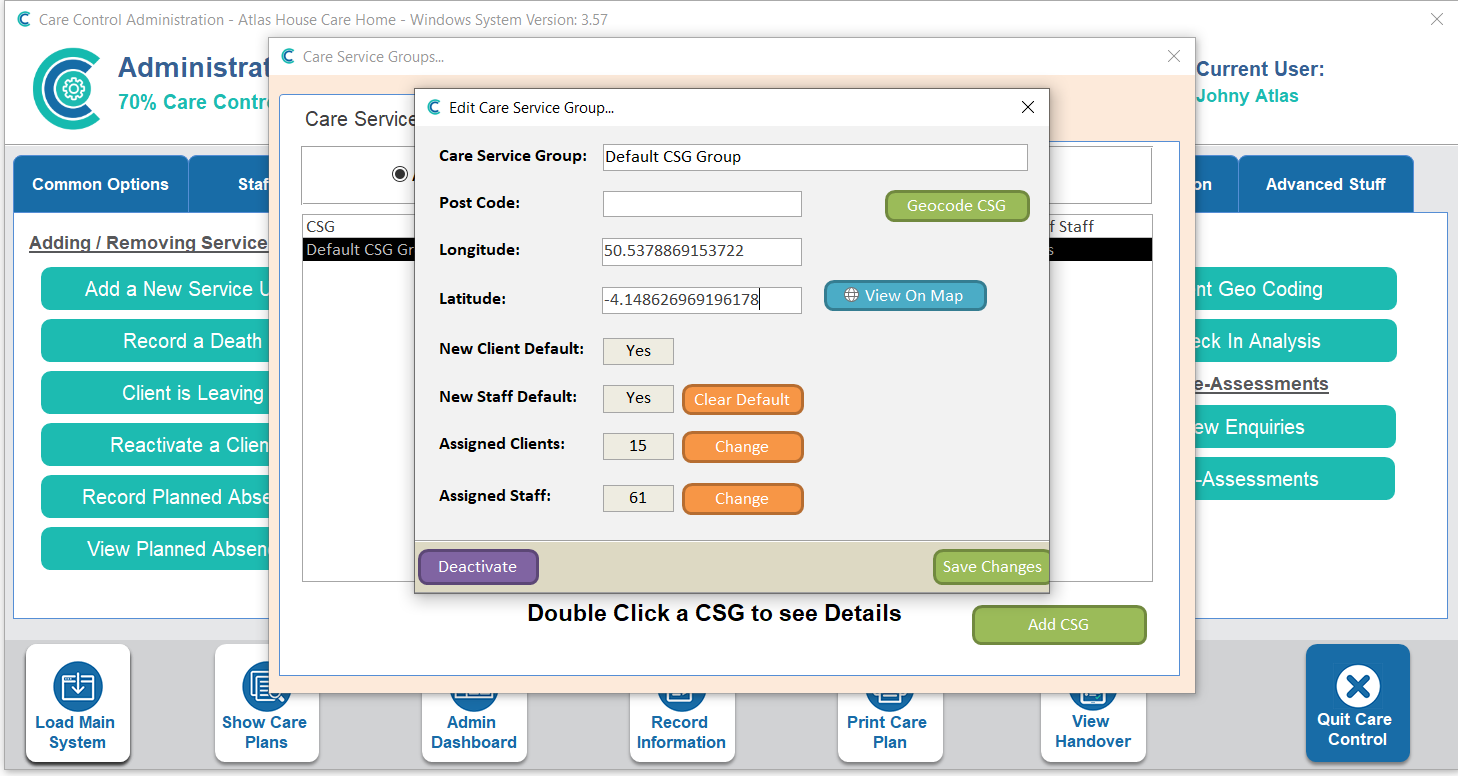
Now, in Care Control Windows > Client Area > Care Service Groups, you can enter the longitude and latitude numbers copied from Google Maps. Make sure to Save Changes after entering the values.
Note: it is important to remove the postcode now that you have accurate longitude/latitude values in order to prevent the system using the postcode.