You can create tasks within Care Control that are more specific to your home, allowing you to make sure duties are not missed or forgotten.
First, go to Administration of Care Control on Care Control Windows.

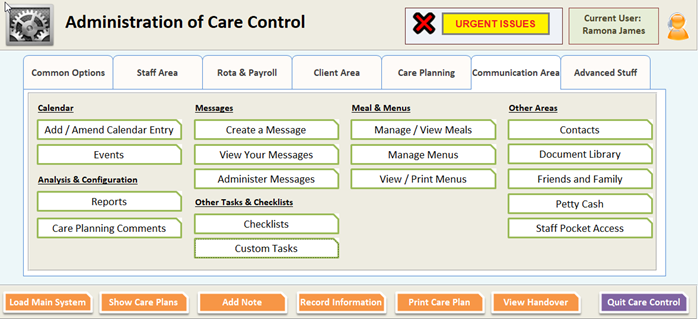
Go to the Communication Area.
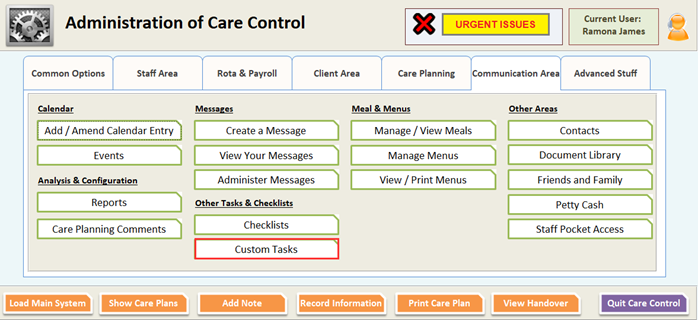
Go to Custom Tasks.
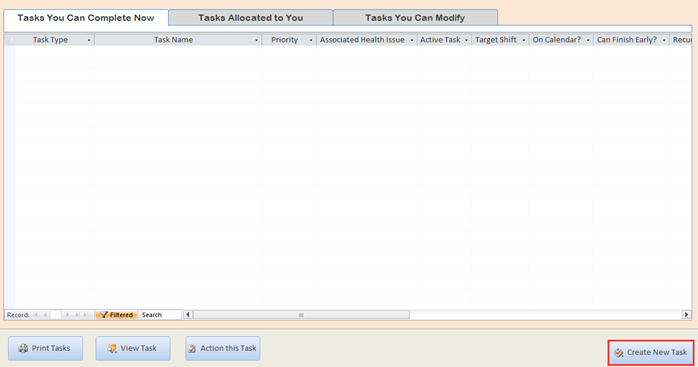
The Task Management window will now open. This will list all actionable tasks and any tasks that can be modified.
To build a new task, select Create New Task.
A window will appear for creating custom tasks.
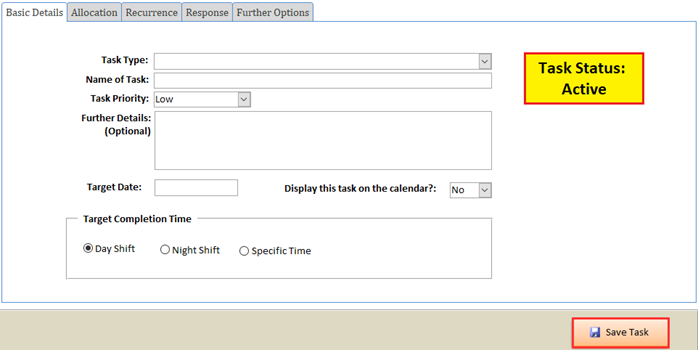
The first tab is for Basic Details.
![]()
Task Type is a drop-down menu with different possible types, from Resident Task to Manicure.
Select the type that best suits your needs.
![]()
Name of Task is the name that will be displayed on the Home Status screen or on the calendar.
![]()
Task Priority tells the system how urgent the task is.

Further Details is a section where you can add extra information about the task if necessary.
![]()
Target Date is the date you wish the task to first appear.
You can also choose whether the task will appear on the calendar. Some tasks can be completed by clicking on them in the Calendar View.

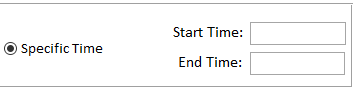
There is an option for when the task is required to be completed. You can either have it set to Day Shift, Night Shift, or create a start and end time for the task to be completed.
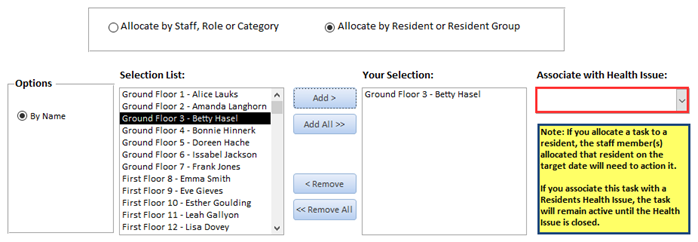
In the next tab, Allocation, you will need to specify who will be assigned the task.
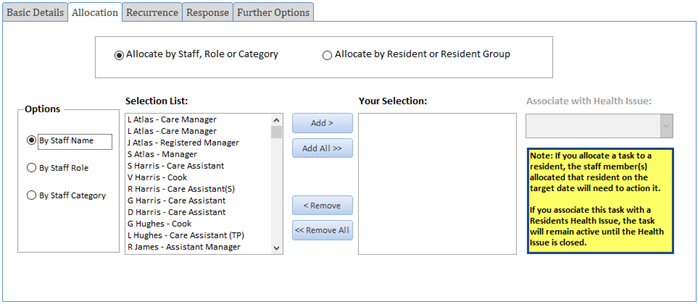
If you allocate by staff, only the selected members of staff will be assigned the task. Alternatively, if you allocate by resident then any staff allocated to the resident on the relevant dates will be able to action it. If a single resident is selected, the task can be linked to a health issue and will expire when the health issue is closed.
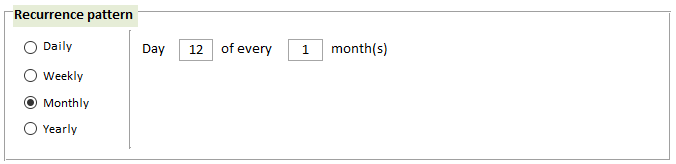
The next tab, Recurrence, relates to when and how often the tasks needs to be actioned.

If No is selected for ‘Is this a recurring task?’, the task will appear as a one-off action.
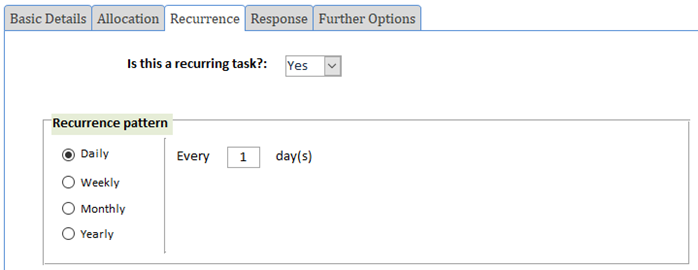
If you select Yes, you have several options.
If you select Daily, you can select how many days will pass before the task comes up again.
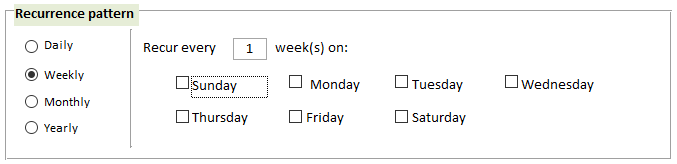
If you select Weekly, you can choose which days of the week the task will be actionable.
If you select Monthly, you can designate a specific date each month for the task to be completed. Please note that if you choose a date such as 31st, the task will not appear in some months. If you require the last day of each month, for instance, you may need to create separate tasks for other months.
If you select Yearly, the task will be available every year on the same date as the Start Date.
You can also choose the Range of Recurrence.

Selecting ‘No end date’ means the task will follow the Recurrence Pattern until it is manually deactivated.
Selecting ‘End after’ allows you to choose how many times the task will be actionable before it automatically deactivates.
Selecting ‘End by’ gives the task a final date to be completed, after which it will become deactivated.

If you have set your Start Date in Basic Details, you can press the button for Example Task Instances to show a list of dates when your task will be actionable.
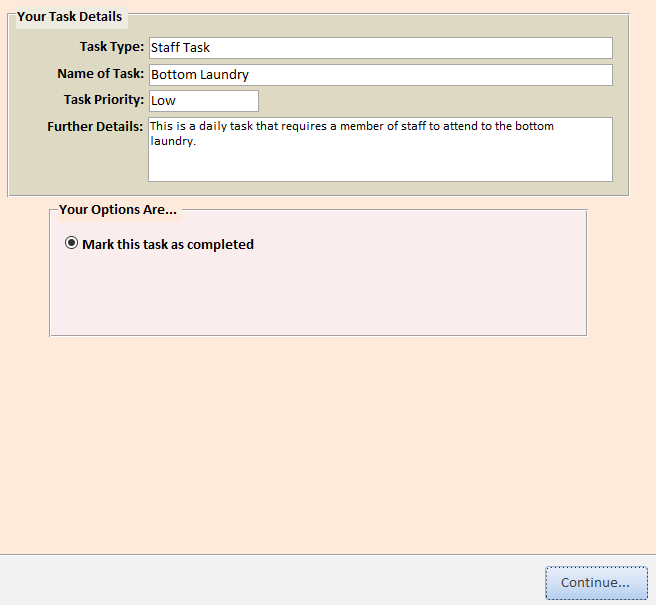
In the next tab, Response, you will select how the staff member records the completion of your task.

If you choose ‘No’ for whether a response is required, selecting the task at the point of completion will present a window similar to the following:
If you select Yes, you get a few more options.

The response prompt can be an instruction on what should be recorded or could be a question about the task. The response given can be recorded as a note on the resident’s care plan if required, and can also be sent to a staff message group.
In the final tab, Further Options, you get a few extra choices for your task.
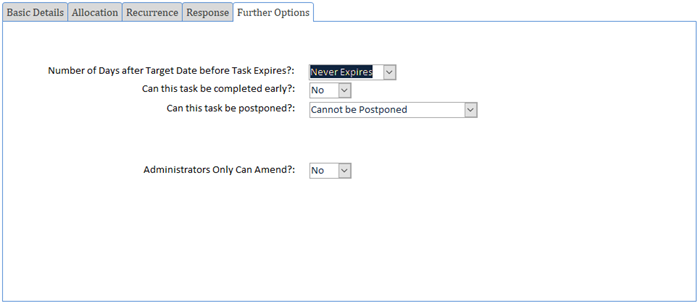
‘Number of Days after Target Date before Task Expires?’ determines how long the task will stay on the Home Status screen if it isn’t actioned.
‘Can this task be completed early?’ allows you to choose whether the task can be completed before necessary.
‘Can this task be postponed?’ lets you choose whether staff can choose to complete the task the next day.
‘Administrators Only Can Amend?’ selects whether, if the task can be postponed, only a staff member with administration rights can postpone the task.
Once you have the task set up as required, press Save Task at the bottom of the window.
Your task will be active on the system immediately.