
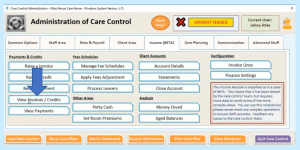
- Statements
- Account Notes
- Invoice Lines
- Finance Settings
- Raise an Invoice
- Record a Payment
Click on the link below if you wish to watch the original Webinar that this help document is based upon:
Income Module Webinar November 2018
In the Webinar, Part 2 of the Income Module information starts at 12:38 minutes into the video and this transcript contains time markers.
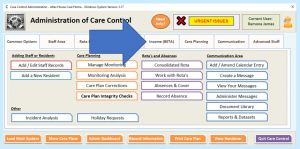
We have added an additional tab onto the Administration page of Care Control called Income and it’s currently flagged as a Beta system.
Beta means that we have tested it here and have made sure that we believe it to be correct, but we’re flagging that this is a big code change; there’s lots of bits of functionality in here and although we’re running it at various other care homes at the moment, we want to make sure everyone is aware that they should be absolutely sure – especially when it comes to some of the complicated fee schedule changes that you can do within this module – that everything is a 100% OK. We will remove the Beta flag at some point, but at the moment we’re just flagging that it is a Beta release.
I just want to go into a different area now which is Statements:

12:48
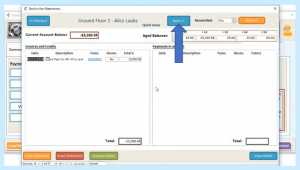
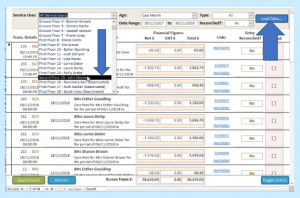
Statements allow you to see the same information – it’s still coming from the account information, but now it’s presented in a different way. We have service users’ names at the top which we can cycle through (use the blue Next box at the top of the screen).
We’ll see a transaction summary on the left-hand side and any payments on the right-hand side:
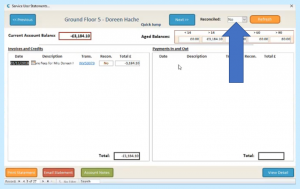
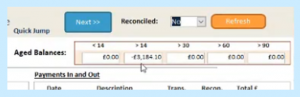
We can filter it by unreconciled or non-reconciled transactions:
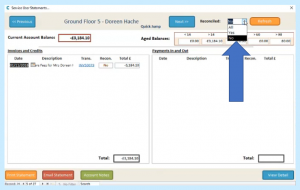
We have an Aged Balance view which gives an indication as to how old this debt may be:
You can print and email a statement:
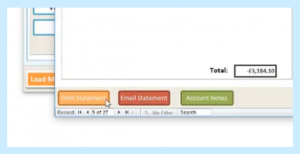
So if you wanted to email a statement to a service user you can do.
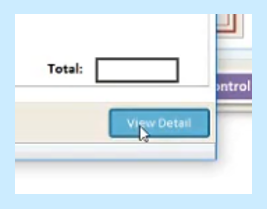
View Detail simply allows us to drill down into the account details screen again and then a new feature coming out in December 2018 is going to be Account Notes:

So one of the immediate feedbacks of this new release was the ability to record notes on a statement screen and so the Account Notes screen will allow you to record notes. So, if you were for example chasing a payment or if you’re just want to clarify a payment from service users’ families you can record a note on there so people aren’t then chasing as well, so it’s a really good idea and that’s going to be available in the next couple of weeks.
14:02
So the Statements screen is really useful and it’s going to be one of those screens that you’re going to use a lot in terms of clarifying with the service users as to what the current state is of the account.
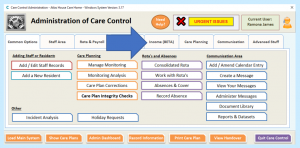
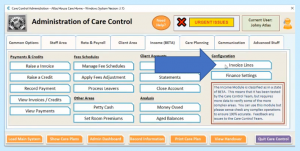
Okay, before we go into invoices and credits etc I just wanted to talk about some settings that you need to be aware of and which you may want to look at in terms of setting up your system. So, if we go into the first one which is Invoice Lines:
Now Invoice Lines allows you to basically control and to detail some set invoice lines that are going to be included when you generate your invoices:
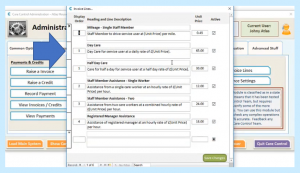
So here we’ve got some examples about service users; taking people to hospital, about mileage rates, about day care, about half day care etc. You don’t have to have these, but this is really about making sure that if you’ve got multiple people raising invoices within your organisation you have a consistency in terms of the price they’re charging and also that the narrative makes sense.
15:12
Another area that you want to consider before you start raising invoices is you go into the Finance Settings:
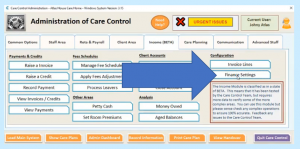
Now the Finance Settings allow you basically to define some core information which is important.
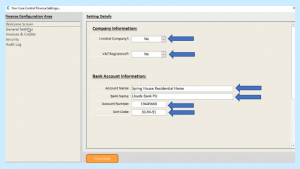
So, for example, you can flag whether:
– you’re a limited company and that information then can be displayed within the invoices and the financial paperwork
– you can flag whether you’re VAT registered
– you can include your account name, bank details etc.
15:44
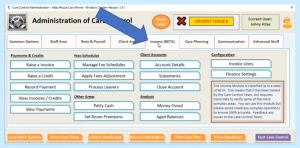
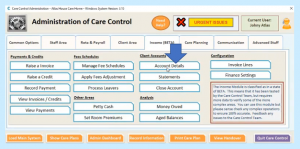
If we go back into our Invoices and Credits…
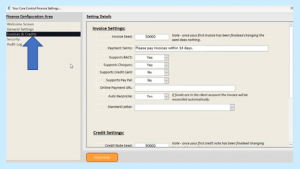
…you can see there’s lots of other settings in it you can do in terms of what you support in terms of your payment options so:
– do you support BACS, Checks Credit Cards?
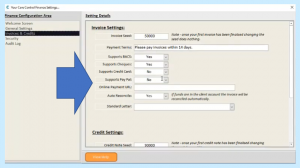
– do you support PayPal payments putting in an Online PayPal URL?
– do support Auto Reconciliation if there’s funds on the account?
– whether there’s a Standard Letter that you may use in terms of when you’re then setting out emails
– or credits etc
You’ve also got the ability to password protect this security module which is actually the default setting.
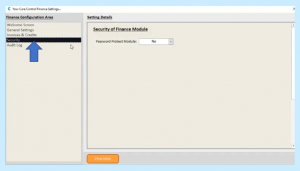
I’ve turned it off this particular webinar because I didn’t want to have to be typing in the password again, but again here you can put your password information in.
Also you’ve got an Audit Log so everything that you do on the system is audited…
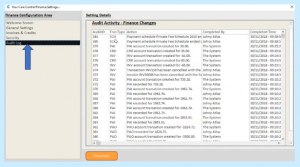 …and the finance part of it, and you can then see who’s raised it and there’s lots of information on here that you can access.
So now you’re happy that you’ve set up your Invoice Lines and your Finance Settings, you can then go and start to use the system in terms of raising invoices. So let’s raise an invoice and we’ll see how easy it is.
16:58
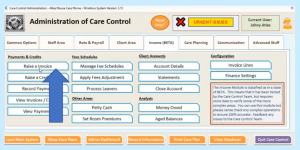
So, if we click on the option which says Raise an Invoice, first thing we need to do is Select a Service User from our list:
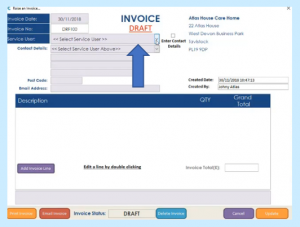
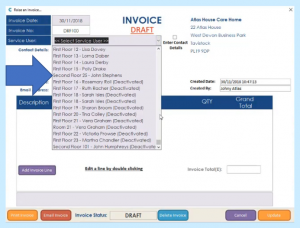
I’ve set up a service user that we can play with today called John Stephens. You pick John Stephens and the primary contact information will immediately be loaded for that service user:
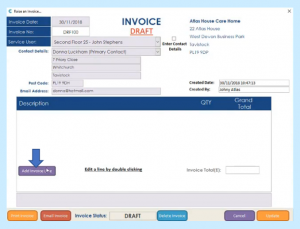
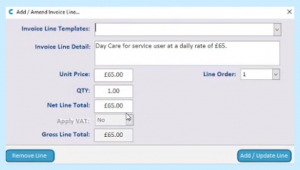
If I then Add an Invoice Line…
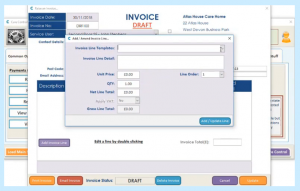
…here we can just free text enter the Invoice Line or we can use one of our Invoice Line Templates that we set up earlier:
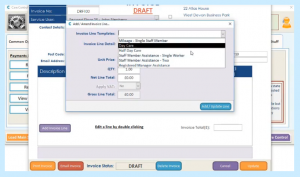
So, say this service user John is coming in for Day Care, we can select Day Care as our Invoice Line…
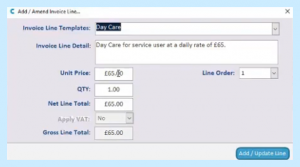
…and the information is recorded, the unit price is recorded and we can just Add/Update the Line. Okay, if we wanted to Edit the Line all we need to do is go back onto the line and double click it with our mouse:
That then takes us back into the Edit and Amend screen where we can either remove it or we can update it and change the contents.
18:08
At this stage, in order to progress we need to Update the Invoice.
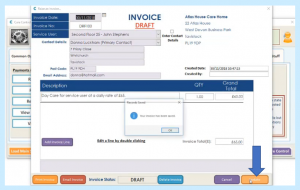
Update basically means we’re going to save the information. So if we click Update now that invoice has been saved, but it hasn’t been finalised yet – you can see it still says the word DRAFT up here:
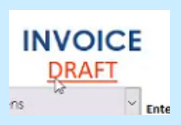
The invoice number is a DRF and DRF stands for Draft, but at this stage if we want to, we can close this window down because maybe we’re not ready yet to send that invoice, we’re going to check some information.
If you want to go back and look at that Draft again if we click on View Invoices and Credits:
It takes us to the account screen for Invoices and Credits:
But you’ll see at the bottom here there’s an option that says View Drafts. If I click on View Drafts it will take me to all the draft invoices set up so far:
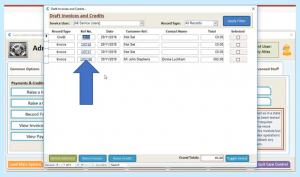
And you can see the draft invoice that we’re currently working on has been highlighted and we can go and click on that entry and it will now load that DRAFT screen again.
19:05
Okay, so let’s say we’re happy that that invoice is correct and we’re going to finalise it so let’s finalise that invoice:
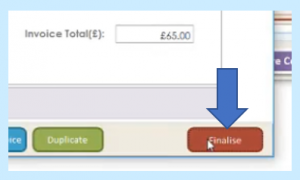
Now the invoice has been finalised you’ll see it’s been given an invoice number:
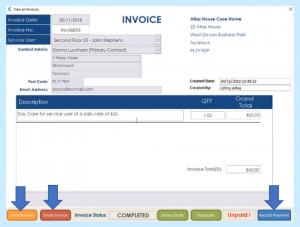
The data can no longer be changed and we can now Record a Payment. Obviously at this stage you may want to print or email the invoice.
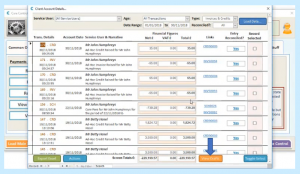
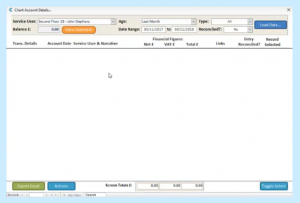
If we go into our Account screen…
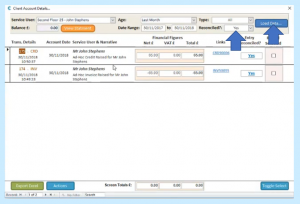
…and we look at the records for John Stephens, you’ll see that he has now got an invoice which is owed against his account:
Let’s say we made a mistake; we didn’t mean to raise that invoice for John. Because we finalised it it’s been written to the account record. The correct procedure will be to raise a credit against that one. what we can do is we can select the Record there:
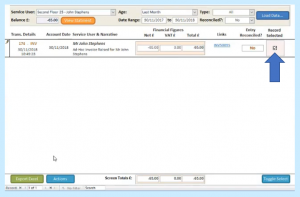
We can go down to our Actions…
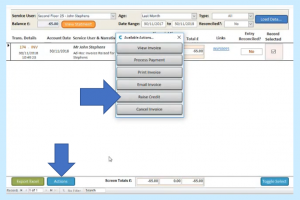
…and we’ll see all the Actions we’ve got. One of them is Raise a Credit, so let’s select Raise a Credit and now the Raise a Credit screen will load… 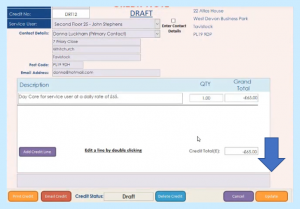
…which will mirror that particular invoice and you can see it’s mirrored against the information. At this stage you can change the narrative if you wanted to add additional information. If we update that credit and at this stage if we were to finalise the credit…
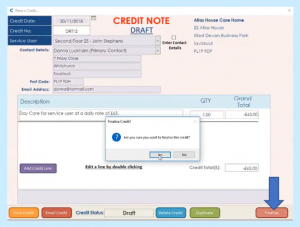
…the credit has been finalised but because we raised it against an invoice…
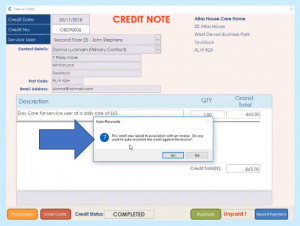
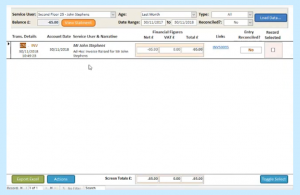
…it’s coming up and says Do you want to auto-reconcile? The auto-reconcile basically means cancel the invoice out with this credit so it’s no longer going to show on the Account screen. If we say yes – we’ll go back to our Account screen:
You’ll see now it’s disappeared because that invoice is actually being shown as a Reconciled invoice…
…and we can go into our Reconciliation…
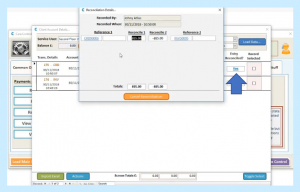
…and we can see that the invoice was reconciled against the credit.
END OF PART 2 OF THE INCOME MODULE