- The Accounts Screen
- Scheduled Payments
- Invoices
- Credits
- Reconciled and Unreconciled Transactions
Click on the link below if you wish to watch the original Webinar that this help document is based upon:
Income Module Webinar November 2018
In the Webinar, the Income Module information starts at 4 minutes into the video and this transcript contains time markers.
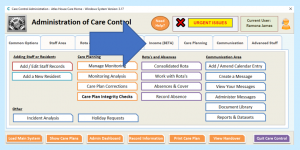
We have added an additional tab onto the Administration page of Care Control called Income and it’s currently flagged as a Beta system.
Beta means that we have tested it here and have made sure that we believe it to be correct, but we’re flagging that this is a big code change; there’s lots of bits of functionality in here and although we’re running it at various other care homes at the moment, we want to make sure everyone is aware that they should be absolutely sure – especially when it comes to some of the complicated fee schedule changes that you can do within this module – that everything is a 100% OK. We will remove the Beta flag at some point, but at the moment we’re just flagging that it is a Beta release.
04:52
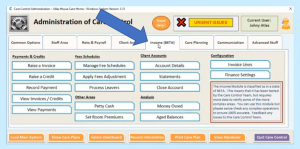
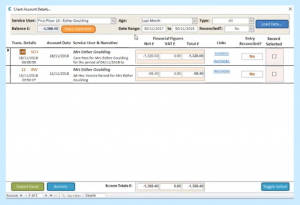
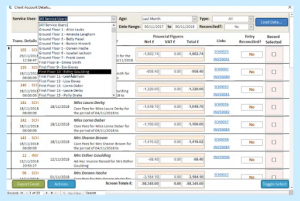
The first area I’m going to talk about is the Accounts screen. What we are trying to do with the Income Module is provide a way of recording the Invoices and Credits raised for service users and also the payments paid out to service users and we primarily do that through the Accounts screen.
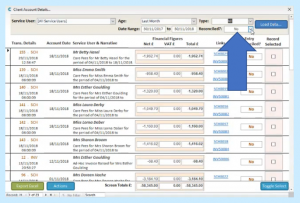
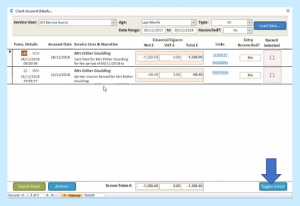
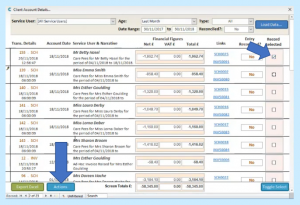
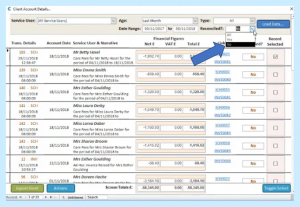
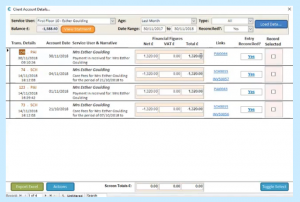
If I load up the Account screen you’ll see it’s quite a busy screen:
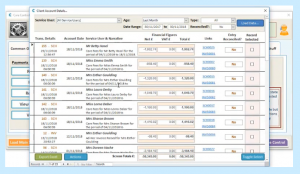
There’s lots going on here already – this page uses dummy data that’s already been loaded on this test system – but what’s really important is that this is just like a transaction list, just like you’d have on your own bank statement at home and it’s really about making sure you can see and use this screen to be able to very quickly drill down into different service users to see what the current situation is.
5:46
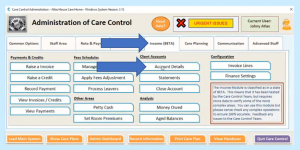
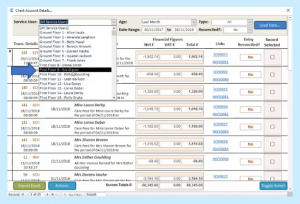
The default view for this screen is for the information to be displayed in a non-reconciled way. That means that we don’t want to see reconciled transactions, e.g. ones we’ve confirmed with our bank statement. At the top of the screen you’ll see there’s lots of ways you can filter information, so first of all we can filter it by Service User:
We can go and look at a particular Service User from the list if we want to.
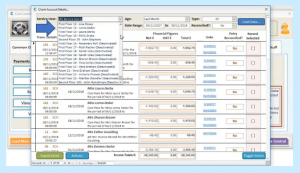
We can also put an Age to the transactioning – how old is this account transaction that we’re looking at? It’s defaulted to the last month on that filter:
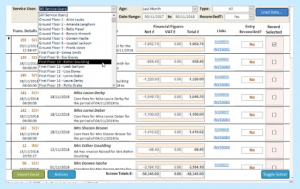
We can also look at what type of transaction we’re looking at, so at the moment it’s All, but you can see that you can filter by Invoices and Credits, Invoices, Payments, Credits or Adjustments:
You can see that you can filter by the Reconciled flag:
The Reconciled flag just means that somebody has signed off that transaction and that it is correct and it’s confirmed within the bank account. At the moment the default is No.
07:00
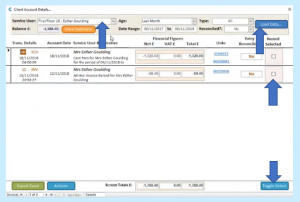
If I were to pick a service user from the list…
…it brings up a balance – this is the balance of the current unreconciled transactions for that service user:
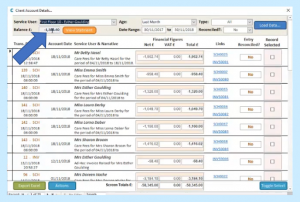
If I click Load Data…
…you’ll now see just those transactions being shown…
…and those figures tally in terms of what the balance is.
If I wanted to change it again and go back to all Service Users and click Load Data, it’s as easy as that:
7:31
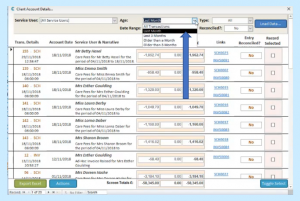
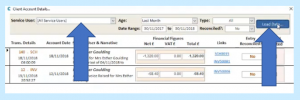
You’ll notice that there are some things which are underlined in blue within the Transaction/Account screen:
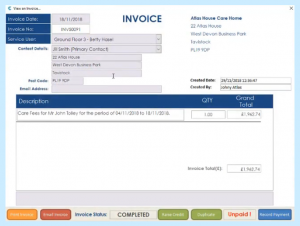
All of those things you can click on, so where it says for this particular service user INV 50091, INV stands for Invoice and if you click on that link it will then load an invoice for you and obviously from there you can do various things like printing it and emailing it etc which we’ll talk about a bit more in detail later:
07:59
If the link says SCH that means it’s a Scheduled Payment – so these are scheduled fee payments – we’re going to talk about schedules a bit later on but again you can click on them and it will take you to the screen where that scheduled information is loaded:
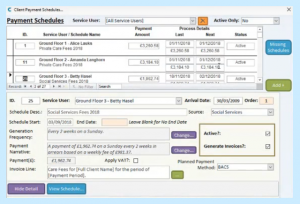
So, the golden rule is, if it’s underlined in blue you can click on it and it’ll take you to further information.
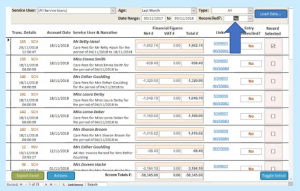
You’ve also got the ability on here to be able to select multiple records at a time and do various actions with them and this is going to be really helpful if you’re doing reconciliations en masse against the bank statement etc and you can do that by clicking this Toggle Select button here:

…and this basically will Toggle and Select all the records:

If you click it again, it will then deselect the records.
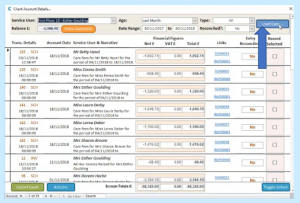
What you can do is filter a Record Set first of all…
…by using the top buttons here:
So we’re looking at just one particular service user here and then you can Toggle and Select those records. Or, if you wanted to you can use the right-click button:
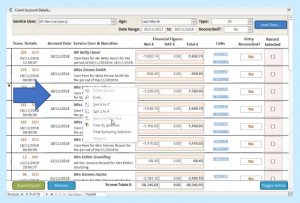
So, I can right-click on the service user’s name and I can filter by that selection…
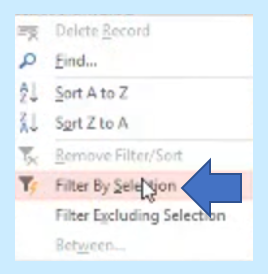
…that gives me the same results, and I can Toggle and Select the individual records.
Now you can also – if you wanted to – select records by just individually selecting them from the list:

The records that we select, we can then use this button which says Actions at the bottom here and depending on what records you select, you’ll be able to do different things with them:
09:36
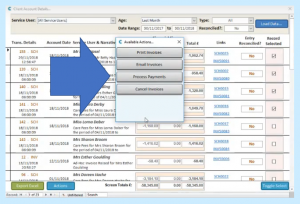
So here we’ve selected some Invoice records which will be generated from schedules and here we’ve got 4 options that we can do with those invoices:
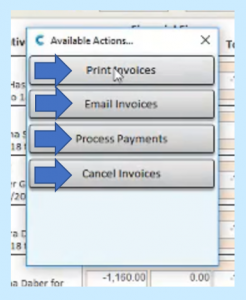
– We can Print all of them in one go.
– We could Email them all.
– We could Process Payments – Process Payments means we’re going to reconcile those invoices against payments that we have received. So if, for example, you’re looking at your bank statement you can see those BACS payments have been made, you can just process them all in one go.
– Or you can Cancel Invoices which we’ll go into a bit later in terms of detail.
If I were to select just one particular record from here and go to Actions…
…you’ll see there’s more options being selected. With one invoice selected we can raise a credit against it if we wanted to…
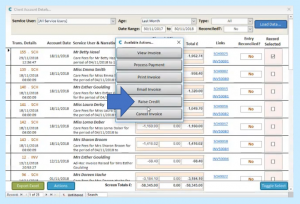
…or we can go and view that particular invoice, for depending on the record type, the transaction type and depending on how many you select, the Actions screen will show you different sets of options, but it’s very useful.
10:36
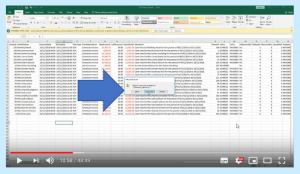
The other thing you can do is you can Export to Excel:
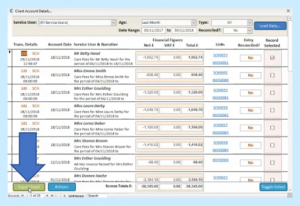
So, if I were to click the Export to Excel button, the system will load up an Excel spreadsheet…
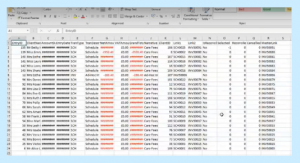
…and you can see whatever’s on that screen is exported for you and then you can go and do various things with that information – so again a really useful a bit of functionality.
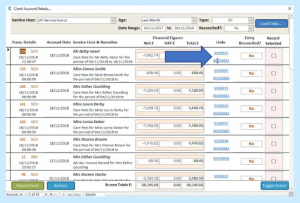
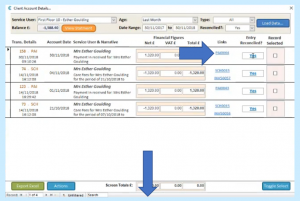
We’ve mentioned that this is a screen that’s showing Unreconciled Transactions:
If I were to look at Reconciled transactions…
…and we pick a Service User in question…
11:22
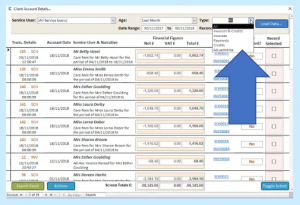
…so if we go back to our service user Esther, we can now look at the transactions that have been Reconciled and you will see with Reconciled Transactions there are going to be payment records as well as Invoices or Credits.
If I click on a Payment record you’ll see that payment information has been recorded…
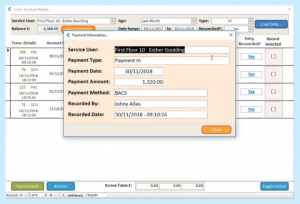
…who it was recorded by and what the amount was. But, you can also see – because it’s underlined in blue – you can click on where it says Reconciled…
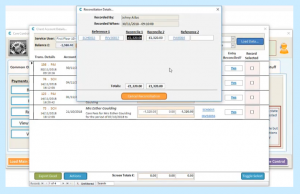
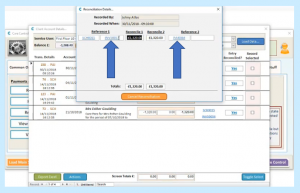
…and that will give you the Reconciliation record and that is the reconciliation between the Transaction and the Payment information – you can see that the invoice is on the left side and then we can see the payment information on the right hand side and again they’re underlined in blue which means all of these are clickable if you want to.
So that’s the Account screen, a really important screen with lots of functionality, lots of ways you can cut the data, look at it in different ways and export it if you want to. But, the key thing is what we’re trying to do in terms of the management of Service Users’ accounts, is we want to know whether we have had all the money that we should have had in terms of the fees that have been raised and that’s what the purpose of these screens is.
END OF PART 1 OF THE INCOME MODULE