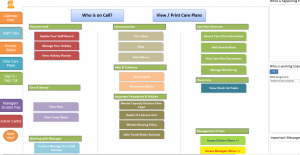
When there is an incident with a service user or staff member, there are several ways you can record what happened.
To record an incident, you can use either the main Windows systems or the Mobile app.
If you are on the computer, you can access incident recording from;
Staff View
Administration Dashboard
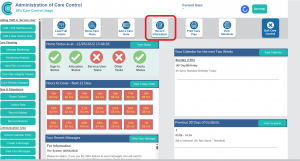
Admin Centre
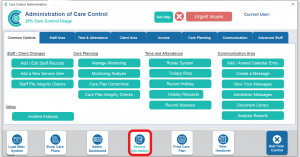
On Mobile;
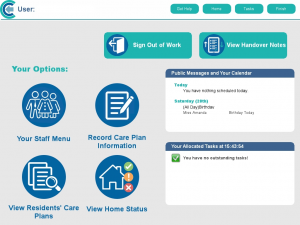
Each of these buttons will lead to the Record Information screen. Select ‘Incident or Accident’.

In the next window or screen you will be able to record the incident or accident. The screen is the same for both Windows and Mobile, with only slight visual differences.
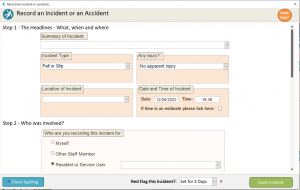
In ‘Summary of Incident’ you can write a brief description of the incident or select a previously written summary that also relates to the current situation.
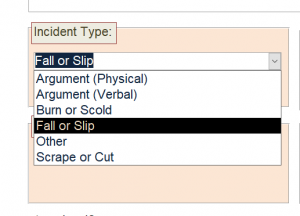
‘Incident Type’ gives you several options.
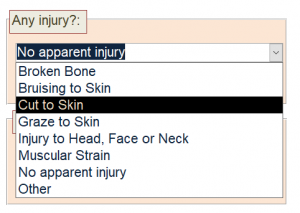
‘Any Injury?’ will give you a few options to describe any injury caused by the incident.
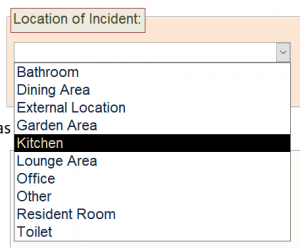
‘Location of Incident’ refers to where the incident occurred. If the location is not on the list, you can select Other and another box will appear for you to manually write in the location.
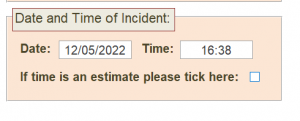
‘Date and Time of Incident’ will be set to the time you opened the report by default, though you can change this when appropriate. There is a tick box for if the time of incident is estimated.
The next section deals with anybody involved with the incident.
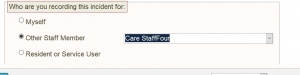
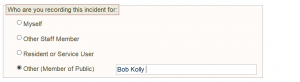
“Who are you recording this incident for:” refers to who was involved e.g. the resident who had a fall. You can chose one of the following;
Myself (the person recording the incident)
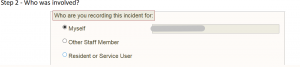
Another staff member
A resident or service user

Or a member of the public.
The next section refers to anybody else who was involved in either way e.g. a staff member participating in an assisted fall. This is almost identical to the previous box except for the option of nobody else being involved.

The following box refers to anybody who witnessed the incident. Here you have an option for if nobody saw what happened or if a staff member witnessed the incident.

The third step is for adding more detail to the incident report.

You can also tick any necessary follow-up actions that will create alerts and tasks on the system that will relate to the incident.

At the bottom of the window you can use the spelling checker. This is a useful tool as some homes will have alerts set up to respond to specific words being used.

You can also Red Flag the incident to bring awareness to the incident and any potential consequences.

Once you have completed your incident report, press Save Incident in the bottom right corner.
