One use for the Ratio Sets within the Roster System is to auto-populate new Roster Templates with role-assigned shifts. Here is how you would do this.
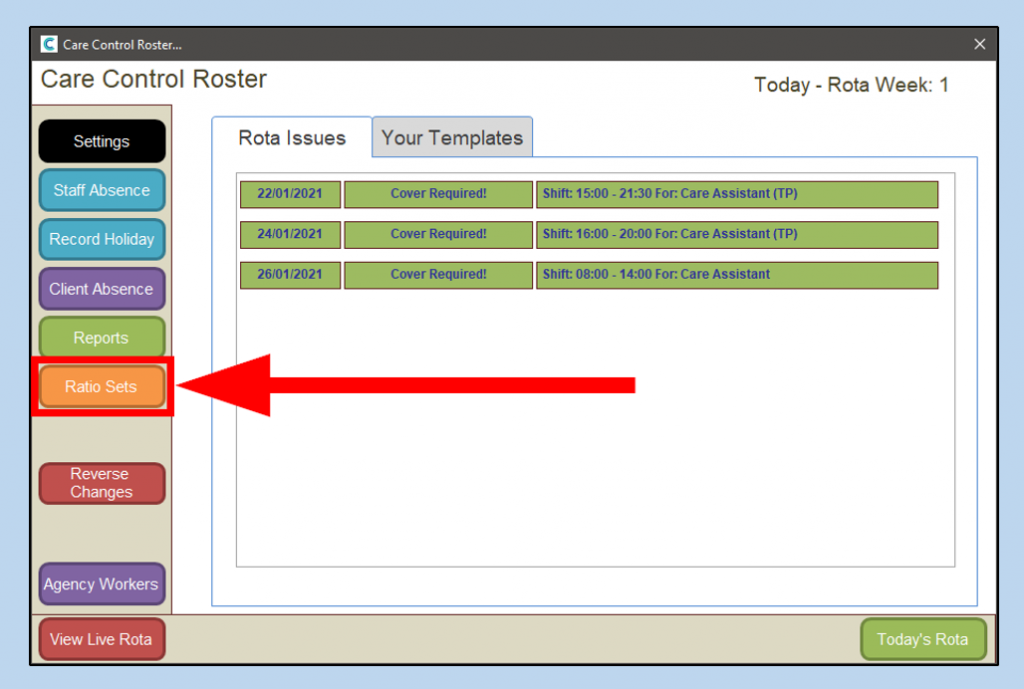
From the main Roster System window select Ratio Sets.
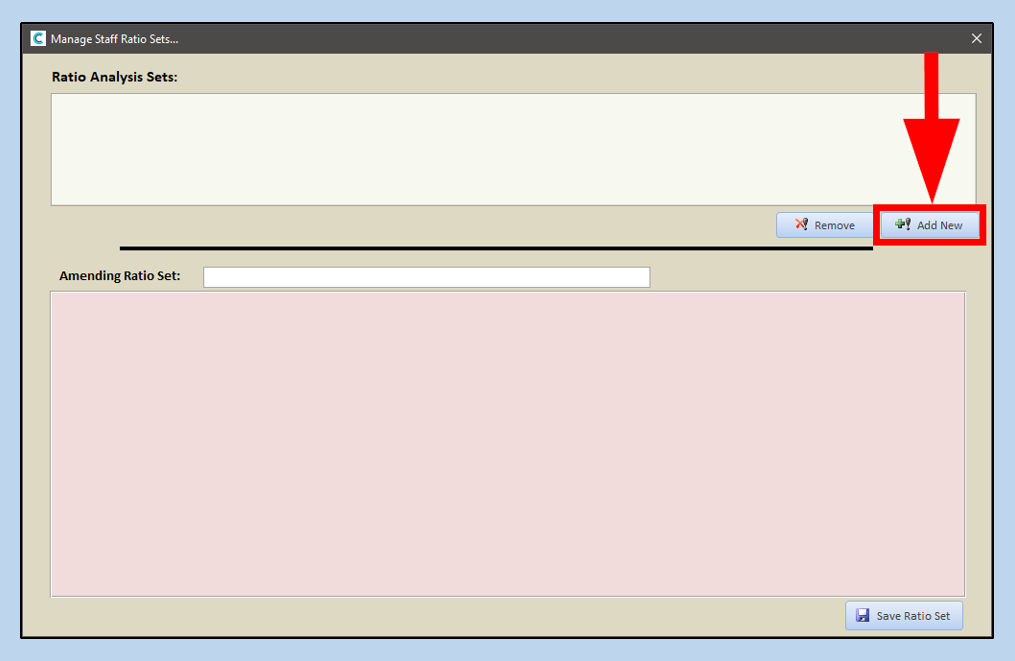
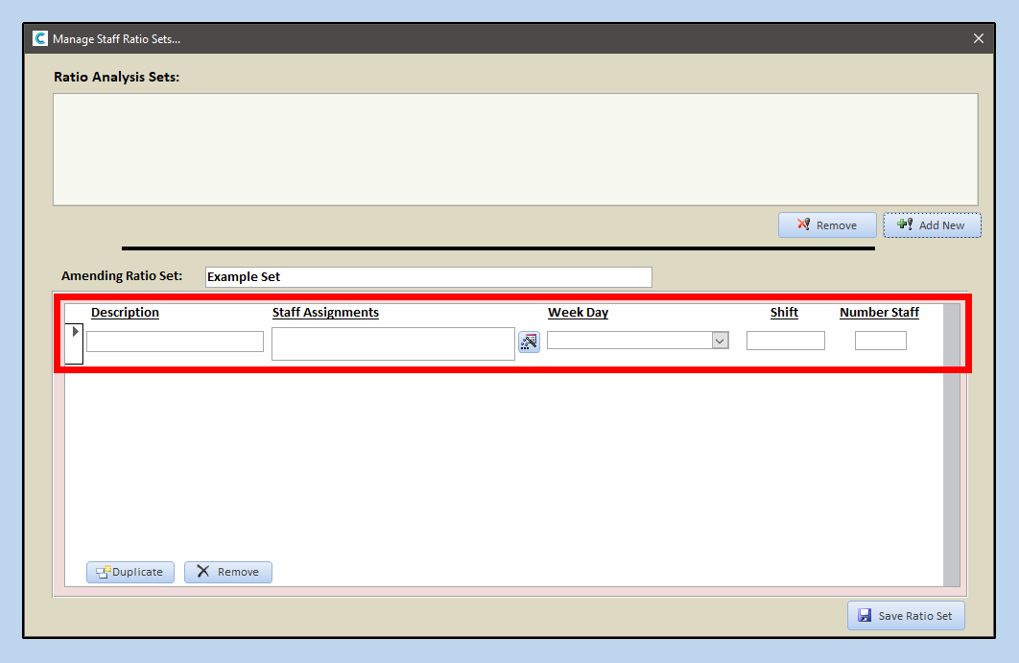
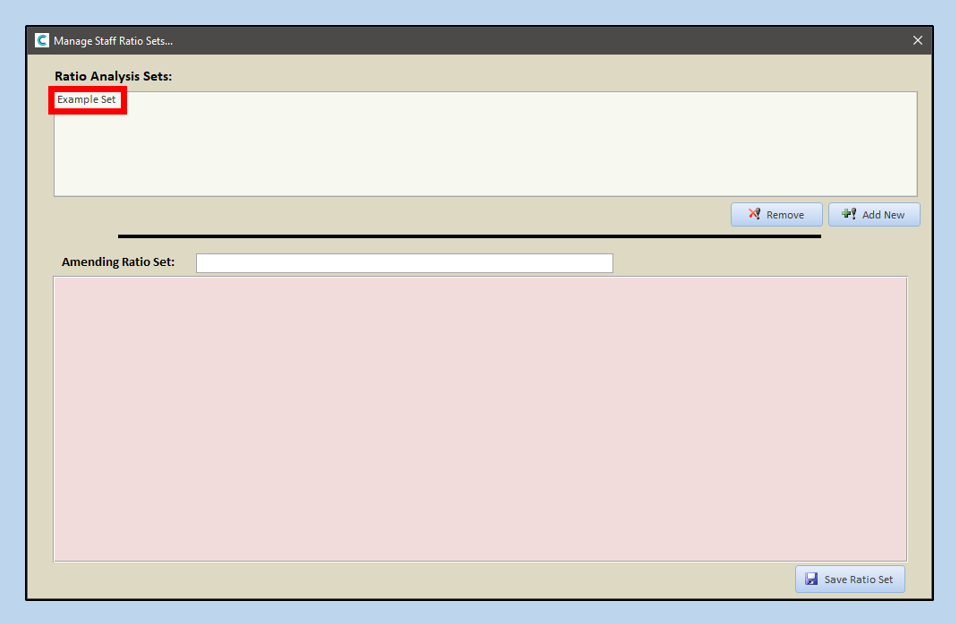
If you have not created Ratio Sets before then the next page will be blank. Click Add New to create a new Set.
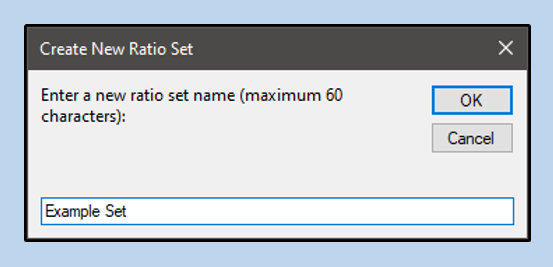
You will be required to give the Ratio Set a name. Enter this in the box available and click OK.
An empty record line will appear in the bottom area of the Ratio Set window.
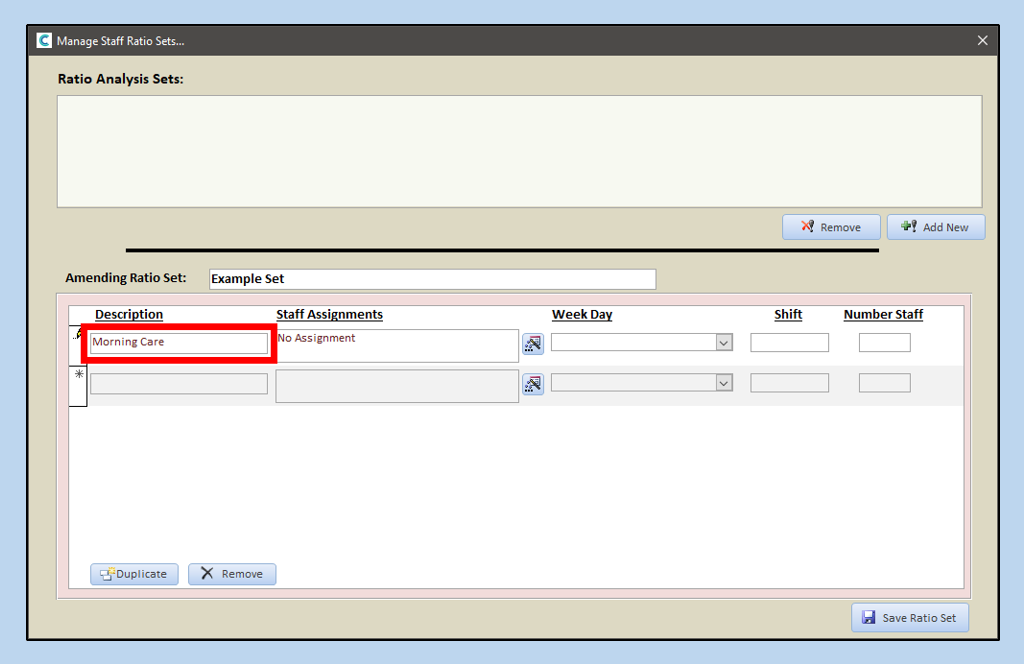
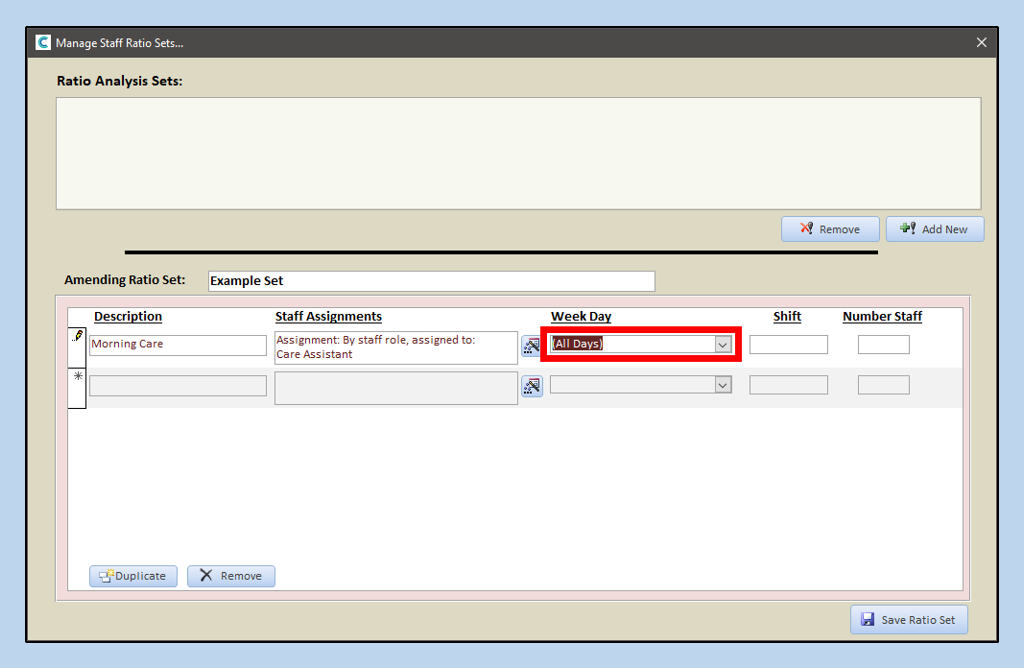
First, we want to enter a Description. This must be unique and will be used to distinguish this line from the others. For this example, we will create a Ratio Set for our basic care staffing levels so we will call this first record Morning Care.
Next, we need o select the job role to assign to the related shifts. Click on the Build button beside the Staff Assignments box.
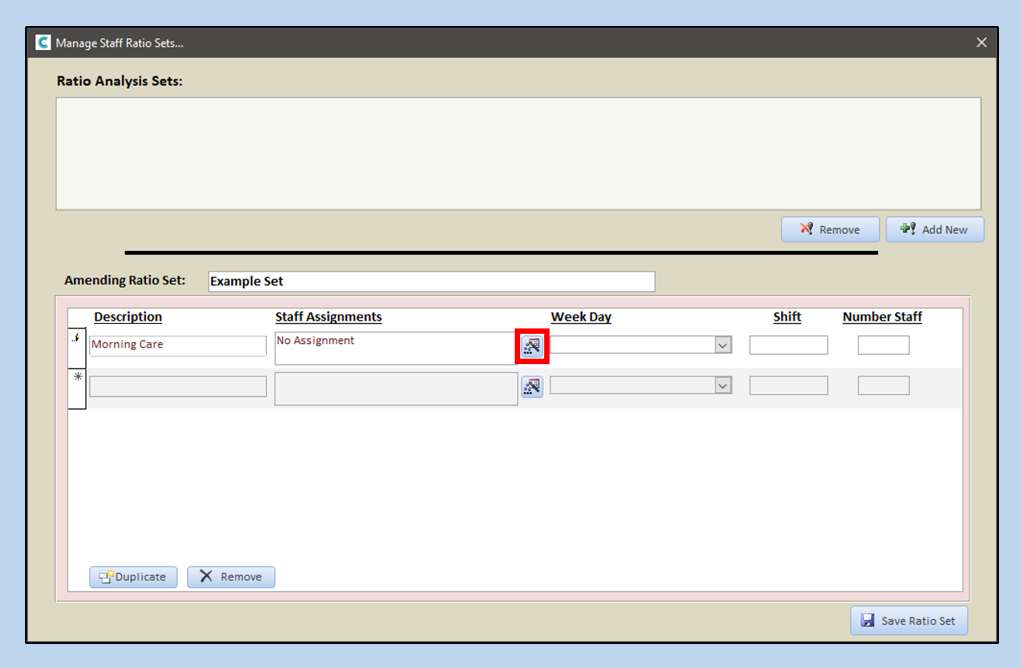
The Build Ratio Set Assignment window will open for you.
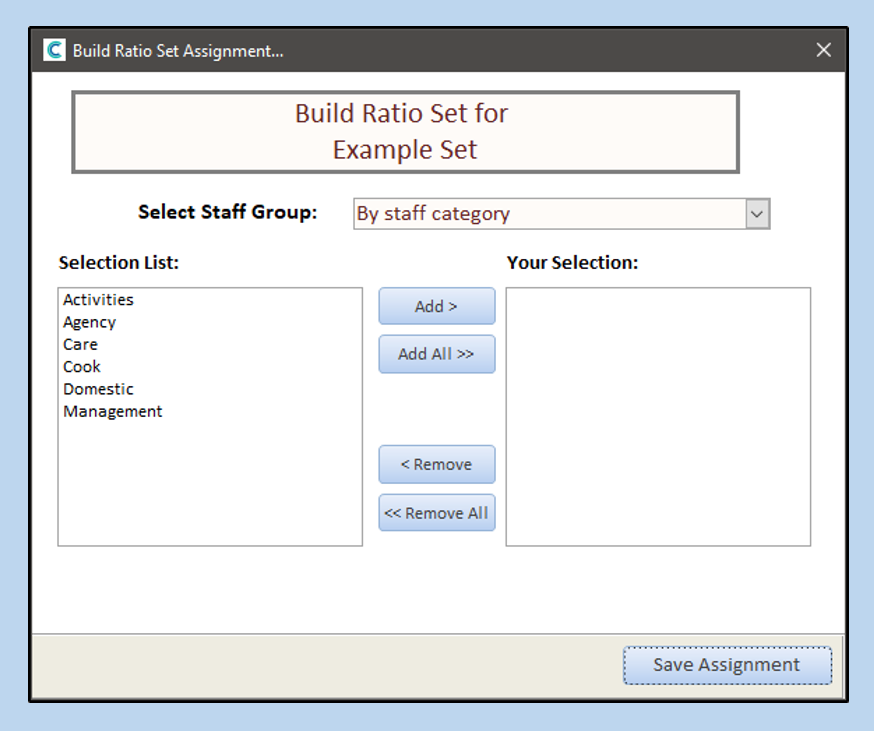
From the dropdown menu select By staff role. If you choose to assign by category, then the Ratio Set won’t create the required shifts (in the Roster System all shifts must be assigned to a role or staff member).

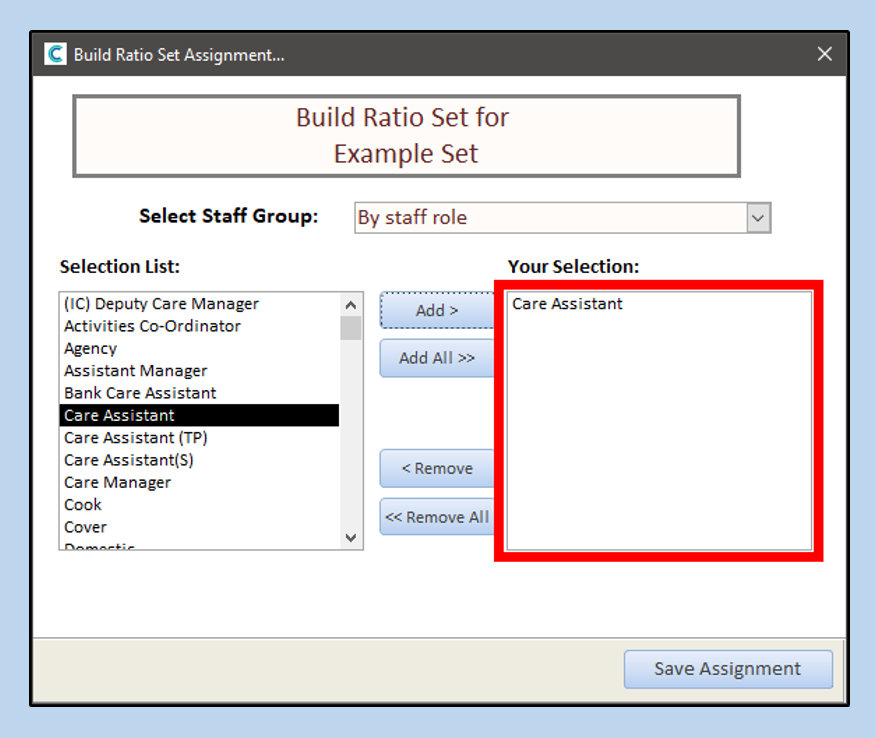
The Selection List on the left will be filled with job roles which are currently active on your system. Select one and click Add to move it into the right-hand box.
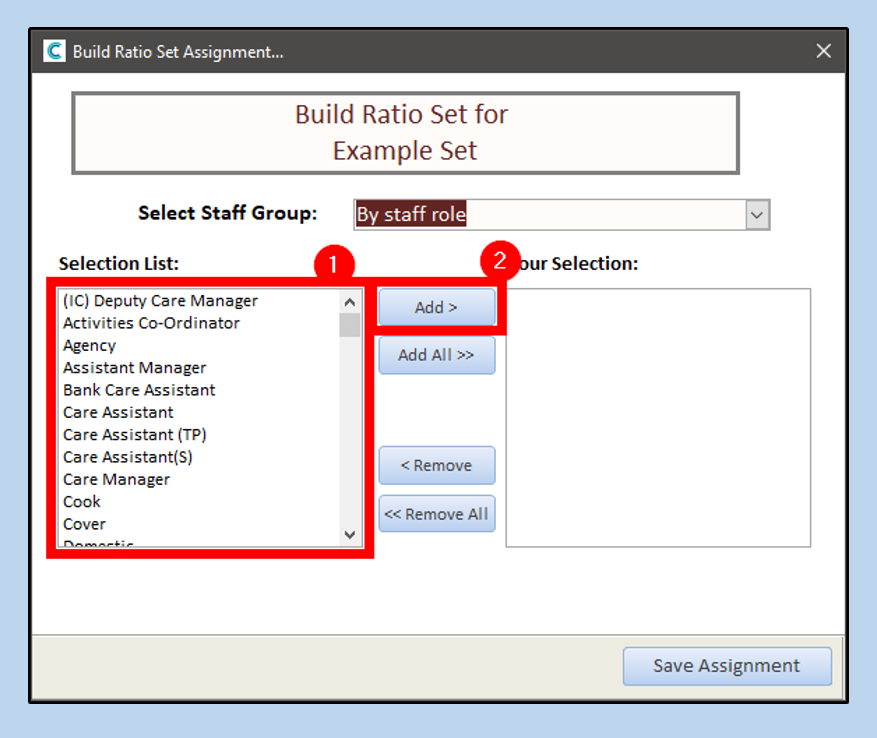
If wanted, you can select multiple roles. This is especially useful if you need an equal number of these roles for the same period of time (creating a Template in this way would create the same number of shifts for each role).
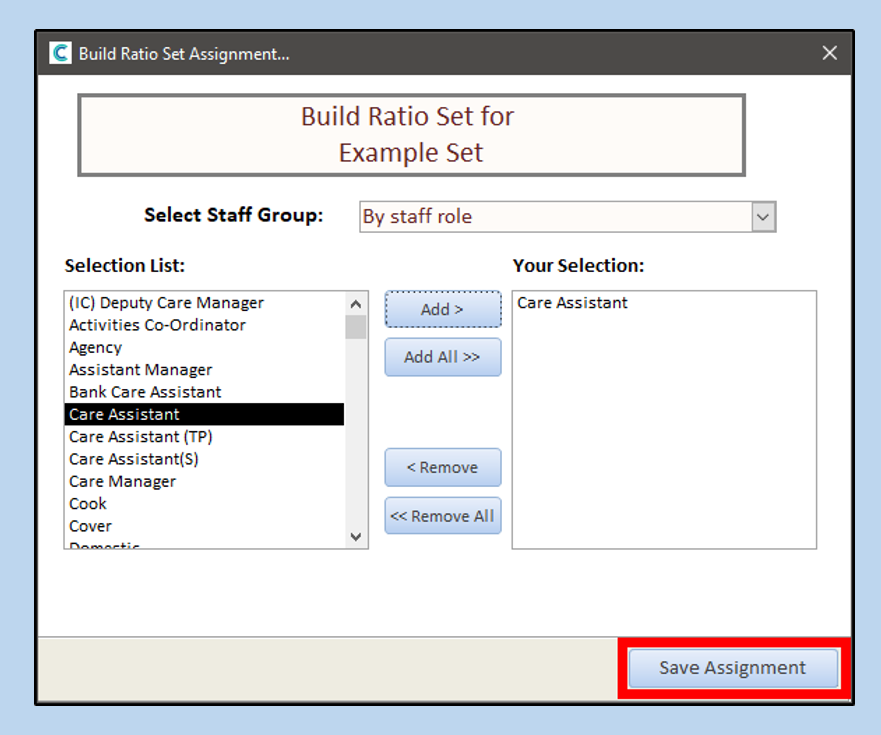
When ready, click Save Assignment.
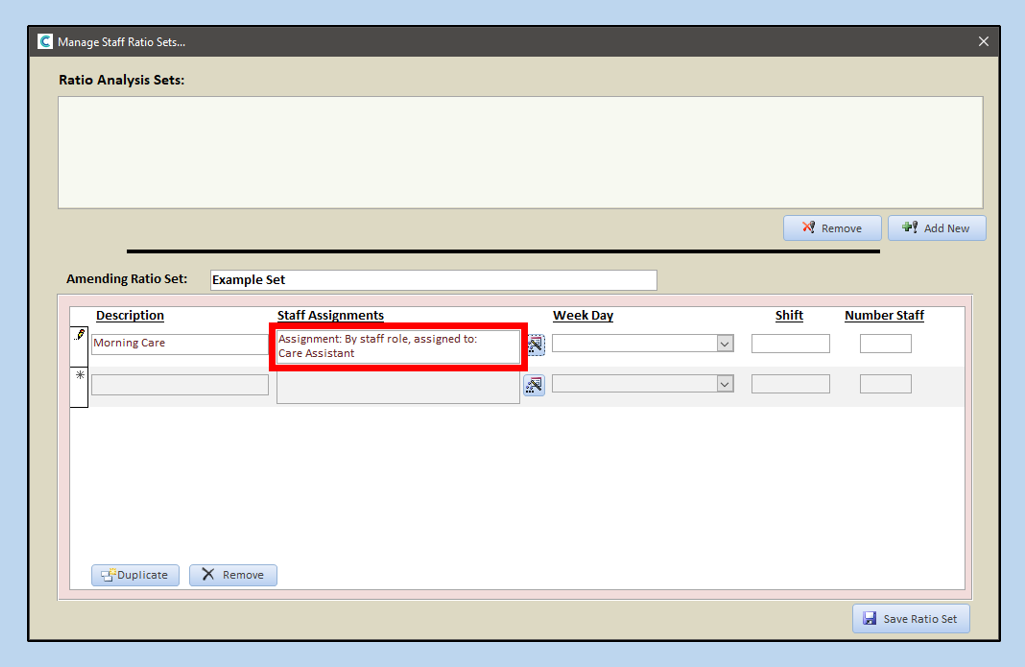
You will notice that your assignment selection is displayed in the Manage Staff Ratio Sets window.
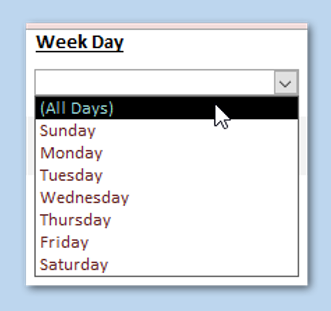
Next, we need to add the Week Day. This can either be a specific day or All Days. For this example we want the same number of staff on each day so we’ll choose All Days.
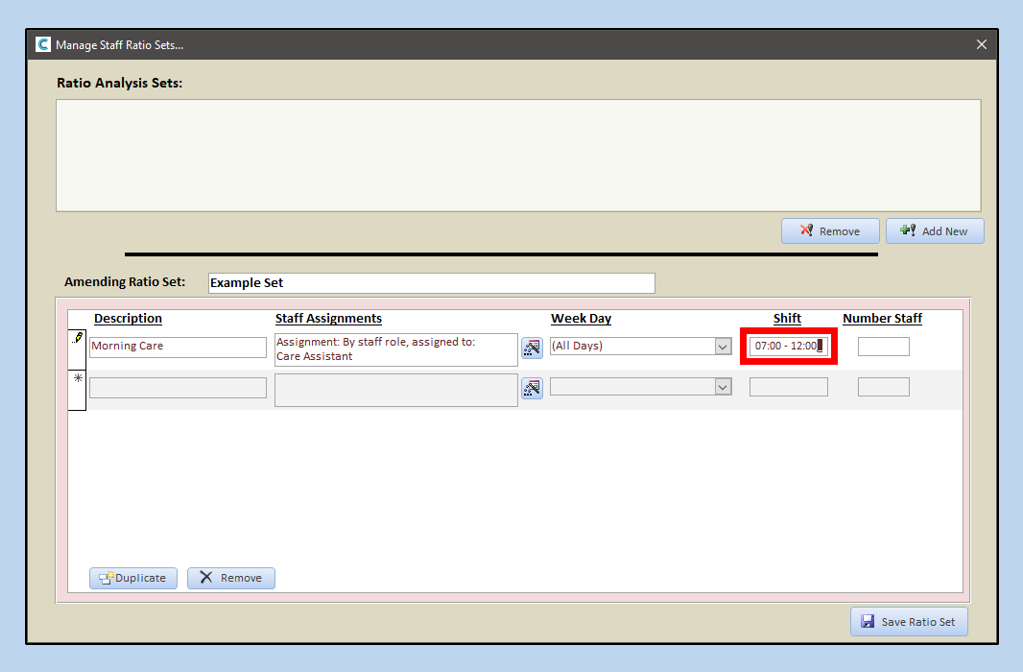
For the next section, Shift,this is the period that the staff will be required. When you base a template off this Set later, this will be used for the shift times.
You can type the hours of the shift directly into the box. Like the rest of the system, this must be in 24-hour format.
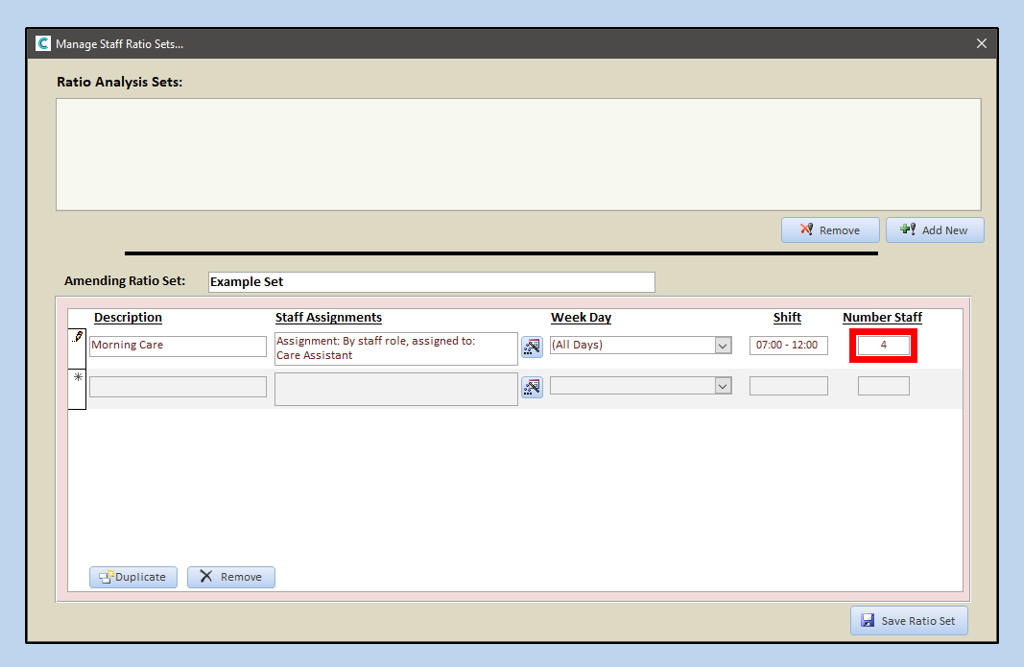
Lastly, we need the number of the selected staff to work this shift. In this example we want four Care Assistants to work during the morning.
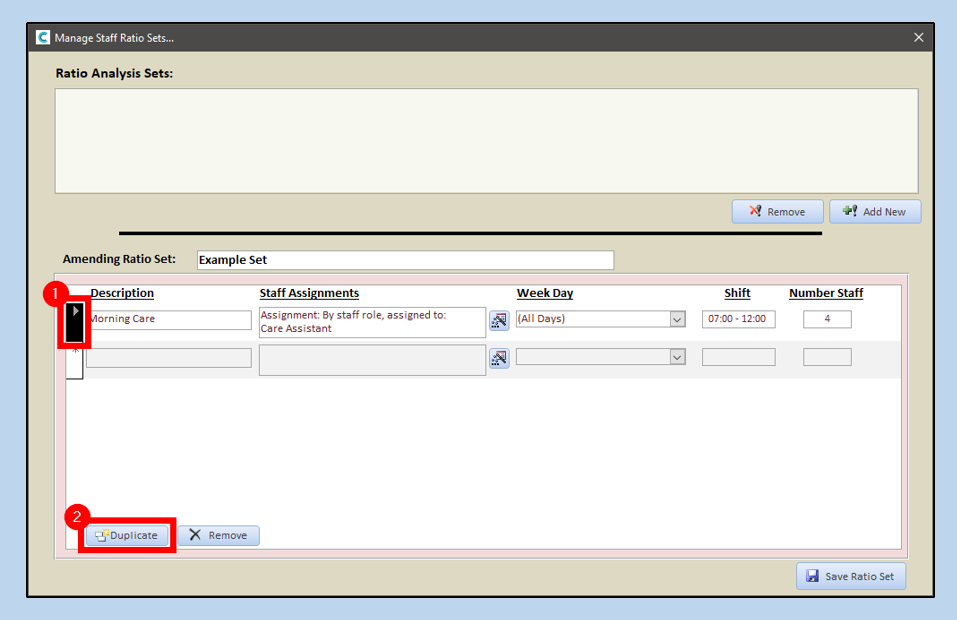
We will need other shifts to fill the day. Instead of repeating every step again we can copy what we have already done. To do this select the Record Selector (the box at the left side of the record you have just created). This will turn the box black (1). Then click on Duplicate at the bottom of the window (2).
This will create an almost-exact copy of the selected row. The only difference is that this will now have “Copy” at the end of the Description (as mentioned before, all Descriptions must be unique).
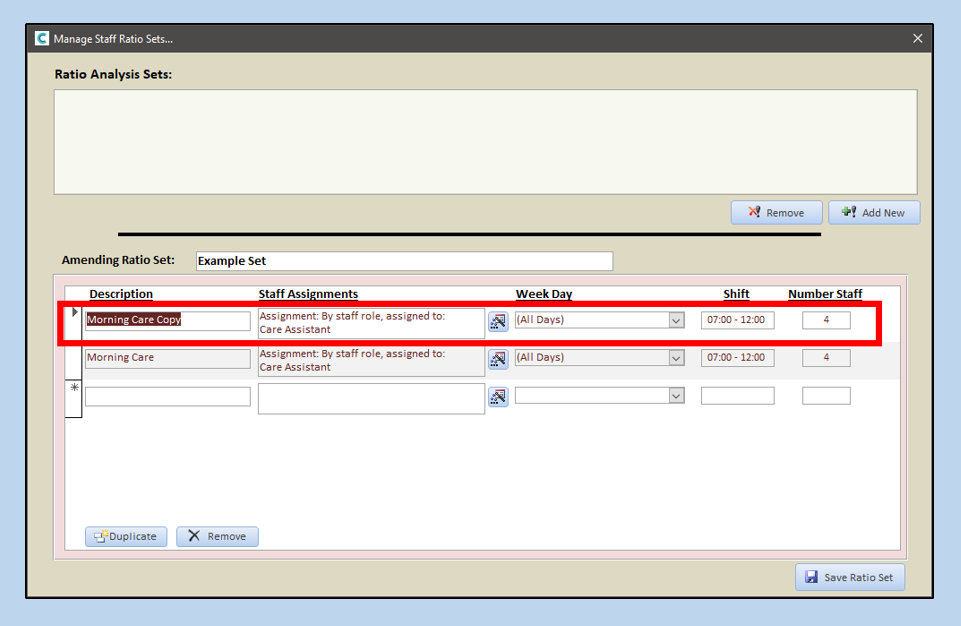
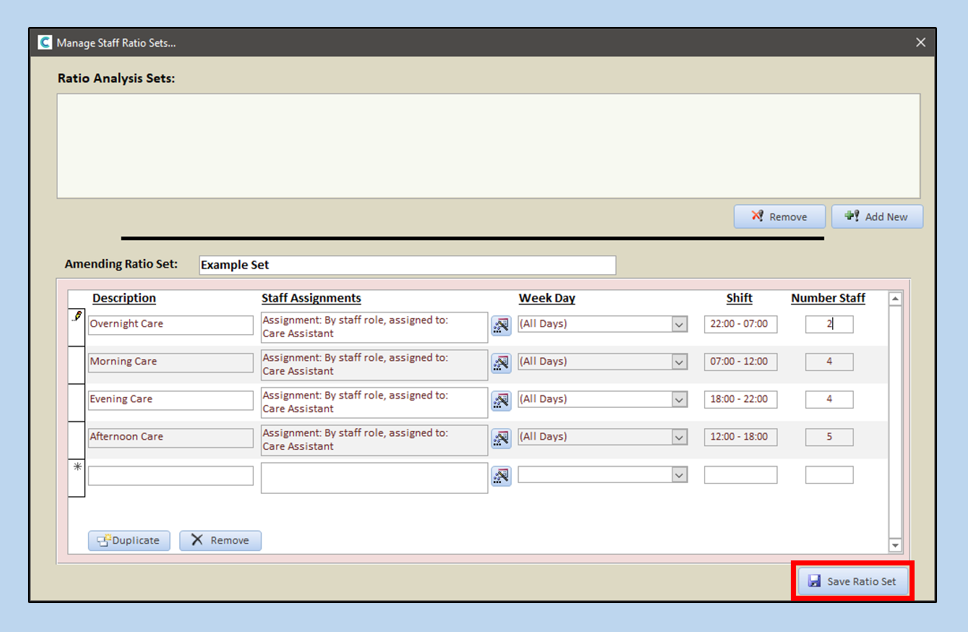
You need to change the Description to something relevant to the shift, amend the shift times and, if necessary, the number of staff. In this example we have created three new rows for Afternoon, Evening and Overnight Care. You will notice that the Staff Assignments and Week Days are the same for all.
We want to see how this looks when we process a template. To do this, you’ll first need to save. Do this by clicking Save Ratio Set.
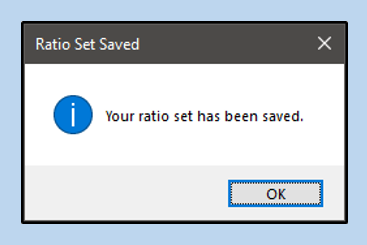
You will get a message stating that the Set has been saved.
You will be able to see your saved Ratio Set in the section at the top of the window.
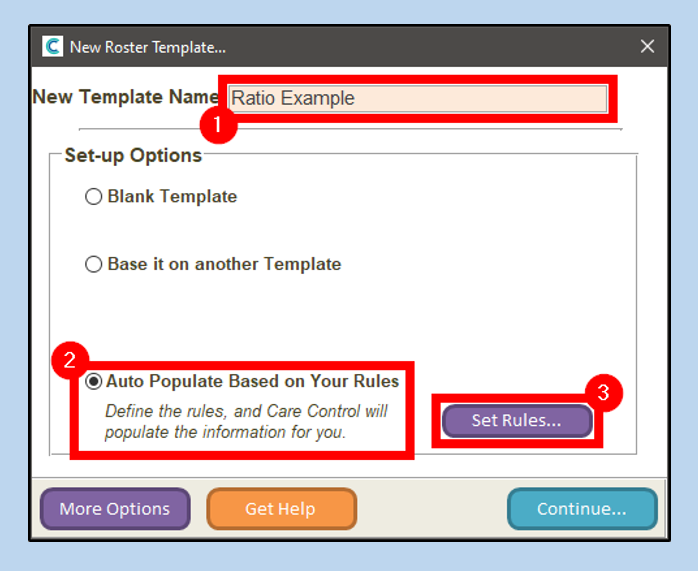
When creating a new Rota Template, you will need to enter a new Template Name (1). To use your Ratio Set, select Auto Populate Based on Your Rules (2). This will then display a button to go and Set Rules (3). Click this button.
An empty window will appear ready to load the Ratio Set you created.
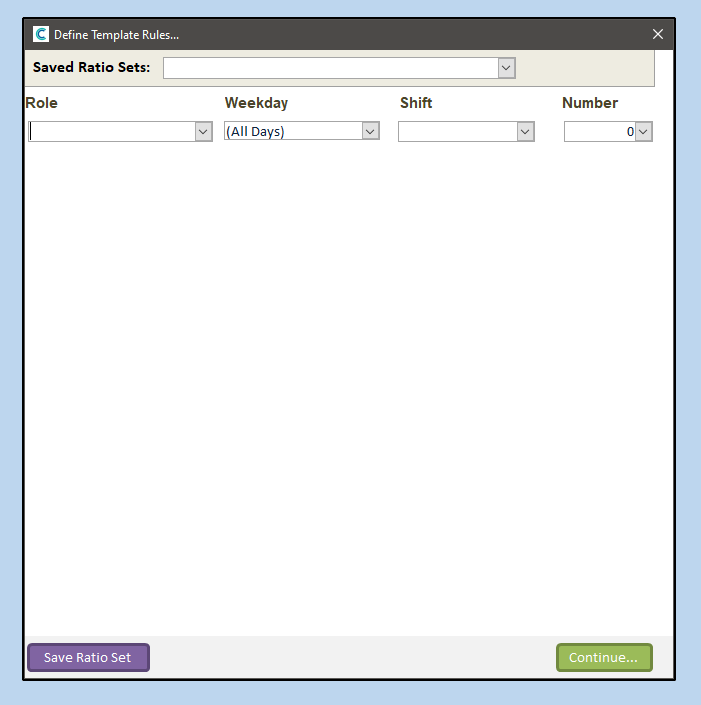
You can select your Ratio Set from the dropdown menu.

Selecting the Set will create rows within the window. The Shift column will be empty- do not worry, this is intended for Sets created with Shift Templates. If you have Shift Templates on your system then you can add these here in place of times.
Click Continue to proceed.

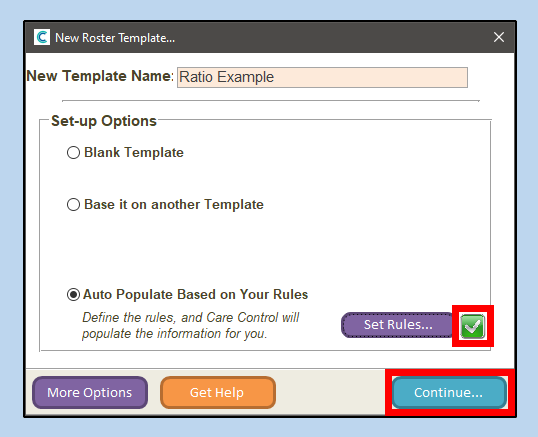
The window will close, and you will be back on the Create New Template window. A green tick will now be showing beside the Set Rules button. You can now click Continue to create the template.
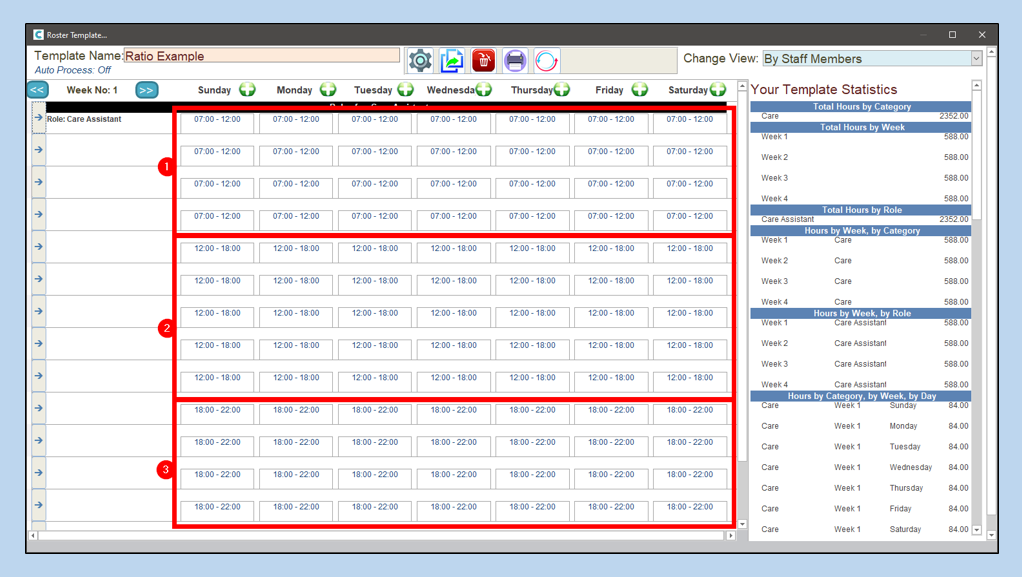
The Template will load. It will be automatically populated with the shifts that have been created using the settings your laid out in your Ratio Set. With this example you can see that we have four morning shifts (1), five afternoon shifts (2) and four evening shifts (3) (the overnight shifts are further down).
This template is now ready for either assigning specific staff or processing to the Live Rota (if you don’t have set staff for shifts but have set shifts).
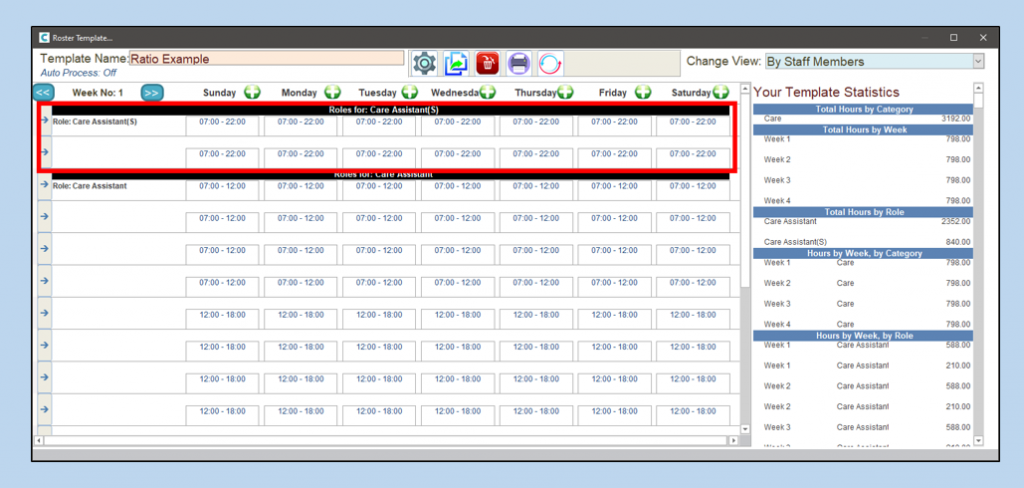
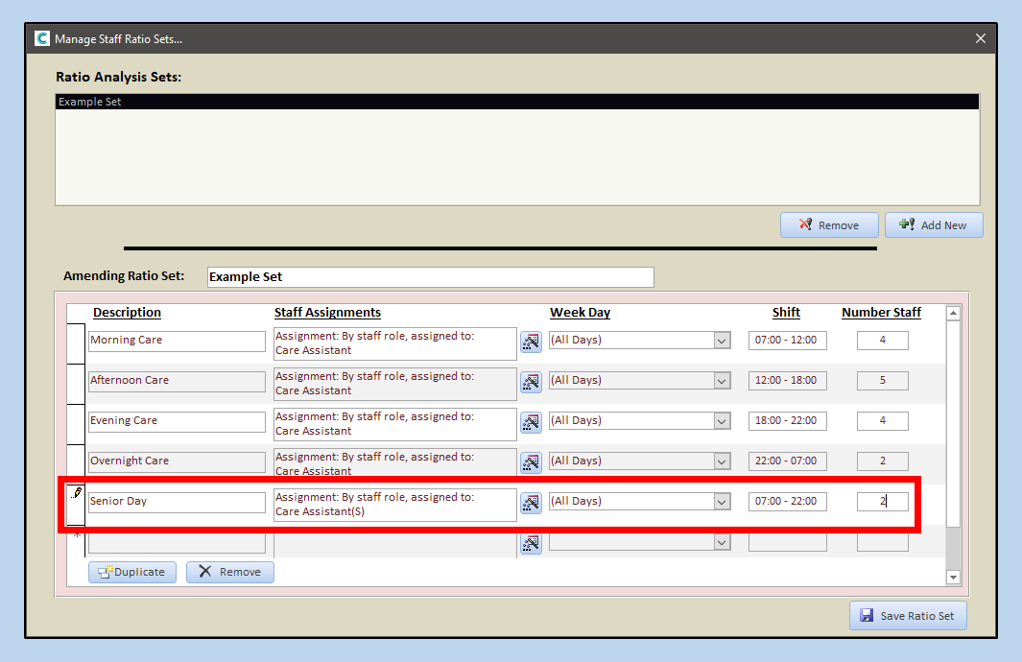
Going back to the Ratio Set, you can add in shifts for other staff types too. In the example below I have added a shift for “Care Assistant (S)” which would run alongside the Care Assistant shifts.
Saving the Ratio Set as before, I can create a new Template (removing the previous one) which will include the Senior shifts.