Shift Indicators are primarily used for modifying pay rates for specific shifts but can also be used to highlight a shift type (working in a specific wing/building, for example). The Shift Indicators are added to the time element of a shift in the Roster System.
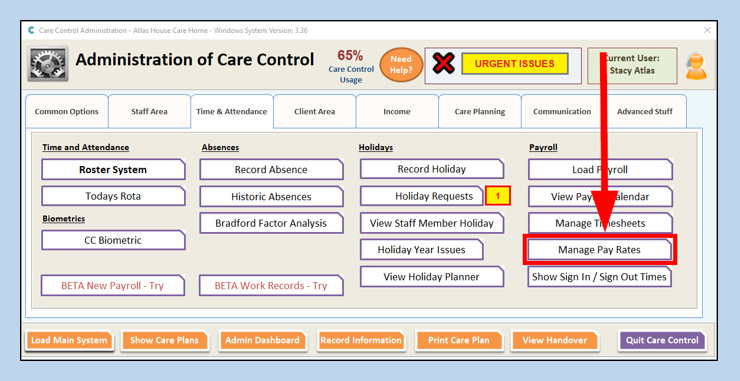
To create new Shift Indicators, go to the Manage Pay Rates area on the Time & Attendence tab.
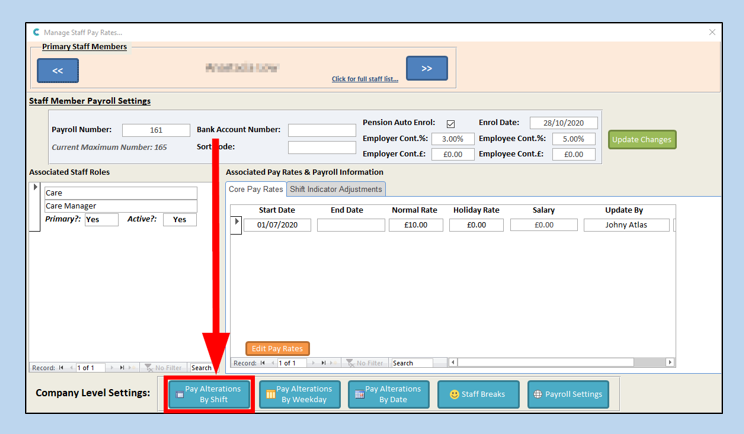
In the Company Level Settings at the bottom of the window, click Pay Alterations by Shift.
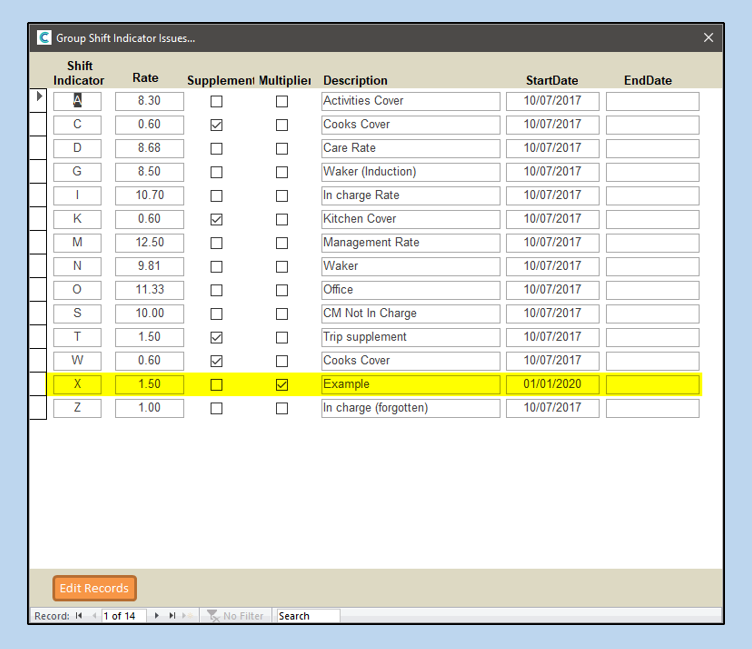
The Shift Indicators window will open. If you have not used Shift Indicators on the system before then this window will be empty, however some systems may have existing Shift Indicators.
To create a new Indicator, click Edit Records.
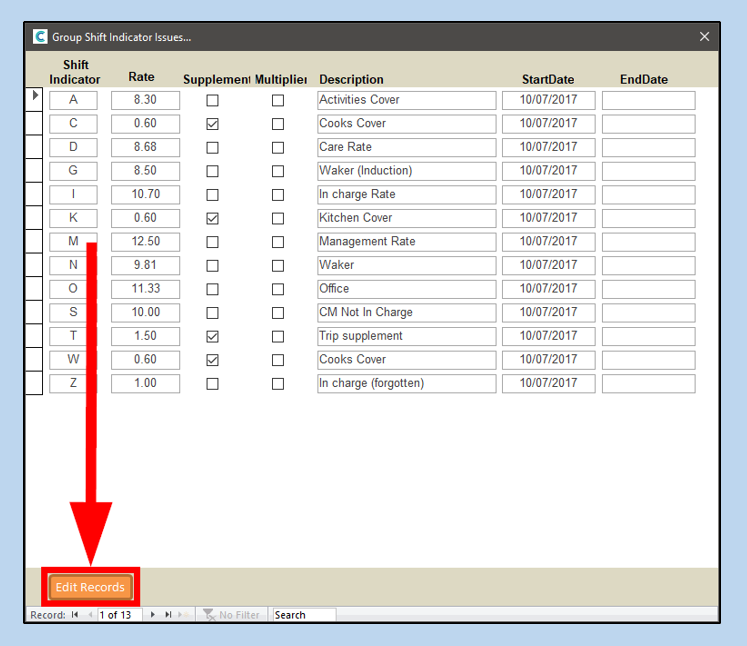
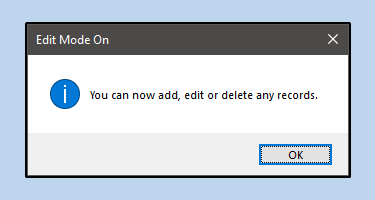
A message will be displayed, telling you that the system will let you add, edit, or delete Shift Indicators. Click OK to proceed.
The Shift Indicator window will refresh. A blank row will appear at the bottom of the list of Indicators- type in this row to start creating your new Indicator.
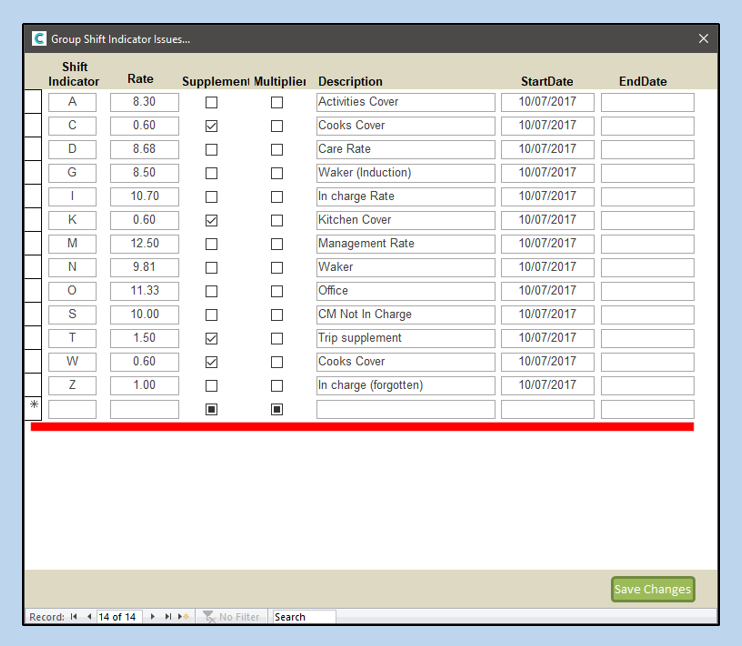
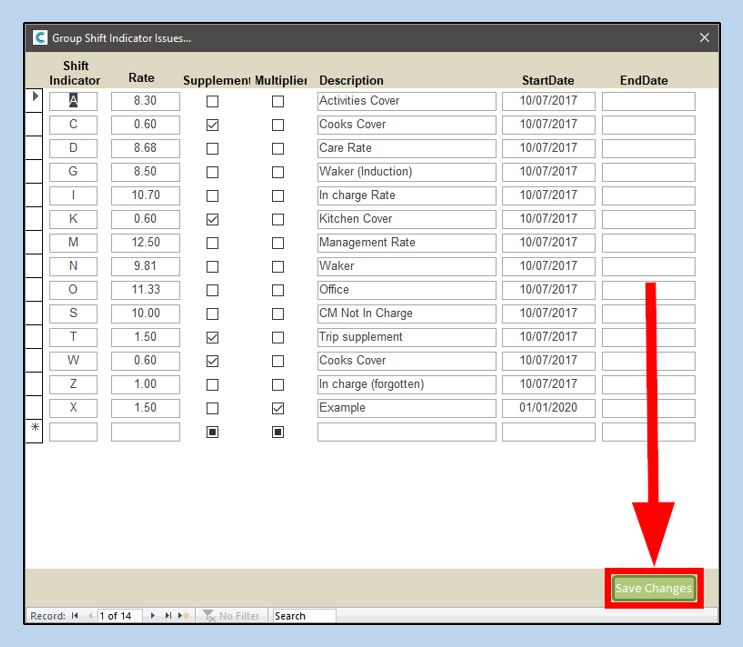
The first column is for the Indicator itself. As this is supposed to appear within the time element of a shift, this can only be one letter (numbers and special characters cannot be used). For this example, we will use X.

The next three sections- Rate, Supplement and Multiplier– are the aspects that affect how the shift’s pay is modified.
If you tick the Supplement box, the amount entered into the Rate box is added to the staff member’s usual pay. In the example below, staff members would earn an additional £1 per hour of the relevant shifts.

If you tick the Multiplier box,the staff member’s usual hourly rate will be multiplied for the shift. In this example, staff members would earn twice as much as they normally would.

The Description box is for a short explanation of what the Indicator represents. This can be anything from “In Charge” to “Overnight”.

The Start Date will determine when this Indicator will start taking effect. If you want this to begin immediately then you can enter the current date or an earlier one. Entering an End Date will stop the Indicator from being effective from that date. If in doubt, leave the End Date blank.

When ready, click Save Changes.
Your Shift Indicator will now be ready to use on the system.