![]()
Once you have created your Menu you then need to add your Meals onto it.
Start by double clicking on your selected Menu.
Then select Add Menu Lines.
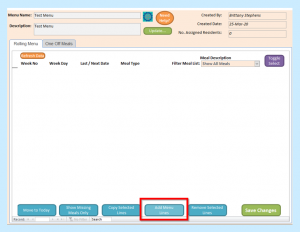
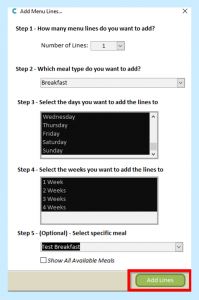
You will then see the following screen.
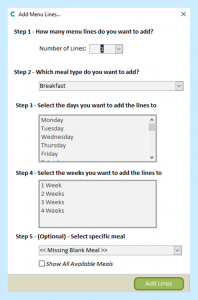
You will then need to go through Steps 1 to 5.
For example, I want to add the meal test Breakfast and this is on the Menu every day. So I have chosen Breakfast, highlighted every day of the week, highlighted every week for my Menu and selected my Meal from the drop-down box.
Once you have added your information select Add Lines.
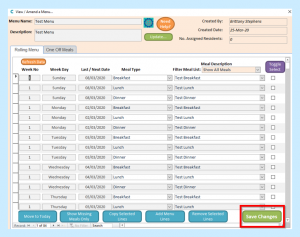
You will then see your Meals.
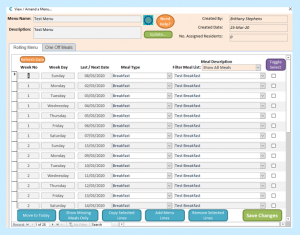
Continue to add lines until you have added all your Meals to your Menu.
Once you have completed this, select Save Changes.
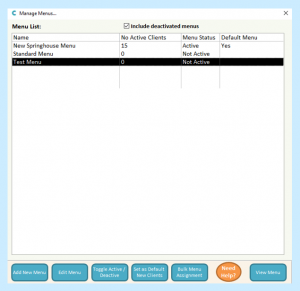
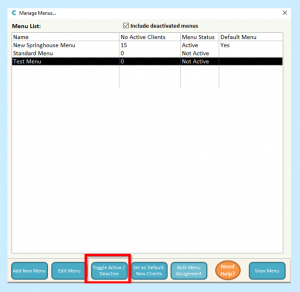
You then need to make your Menu Active.
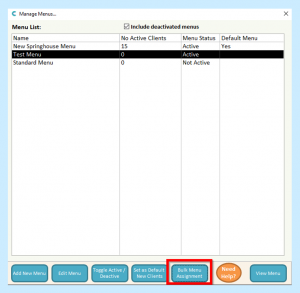
Go back to your list of Menus.
Select your Menu and then select Toggle Active/Deactivate at the bottom of the screen.
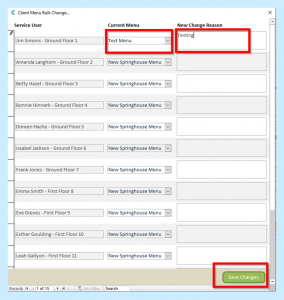
You then need to select which of your residents are to use this Menu.
Select your Menu and then select Bulk Menu Assignment.
You then need to select for each resident which menu they are going to use by selecting from the drop-down box options. You also need to enter a Reason for the Change.
When you have completed this for your residents, select Save Changes.